5 WordPress Tips to Help You Score Above 90 on PageSpeed
Written by ![]()

In the wide world of SEO, there are a thousand different search ranking factors. Some are nearly as old as Google itself, while others are so new that they're barely even understood.
One, which has been around for a few years but is growing in importance, is page speed. Google has offered the PageSpeed Insights tool for years, so there's a ton of information available online about how to speed up your site.
The trouble is, most of these articles are designed to take a site from "bad" to "okay."
When you check a site on PageSpeed Insights, you'll see three ranges; 0 to 49 is red and is considered "Bad." A score of 50 to 89 is orange and is considered "Acceptable." A score of 90 to 100 is "Excellent." Most articles about speeding up a site aim to take you from red to orange or low orange to high orange. After all, that's "good enough" for most people and still puts you in the top 10% of websites out there, if not higher.
My goal is never "good enough." My goal is greatness. That's why I've spent hundreds of hours tweaking every little code snippet, plugin, image, and script on my site to achieve the best website performance in Core Web Vitals, PageSpeed Insights, Pingdom, and GTmetrix. I've put a ton of time (probably too much) into optimizing my site for loading speed, and now I'm ready to share my top five tips so you can get into the green as well.
Let's get started!
Key Takeaways
- WP Rocket handles caching, preloading, GZip compression, code optimization, and lazy loading, likely pushing sites to 75+ scores alone.
- Enabling PHP-FPM and OPcache on your server significantly speeds up PHP processing, but requires a dedicated or virtual private server.
- Cloudflare's APO caches your entire WordPress site on its edge network, improving TTFB and overall performance for all visitors.
- Auditing plugins using tools like Plugin Performance Profiler helps identify resource-hungry plugins that negatively impact page speed.
- Custom CSS fixes like inlining styles, hiding unnecessary elements, and correcting cumulative layout shift can push scores into the high 90s.
1: Use WP Rocket
One of the essential tools I've found for a WordPress website is to use WP Rocket.
WP Rocket is a comprehensive speed, caching, and optimization plugin. It does a little of everything, and it does it all quite well, unlike many all-in-one style plugins. I've been using it for years now, and I'm incredibly impressed.
Frankly, unless your site is pretty bad, WP Rocket alone will get your site into the 75+ range. You have to have a pretty slow server, some broken scripts, or some significant issues for it to fail. Well, that, or misconfigure it.
What does WP Rocket do for you?
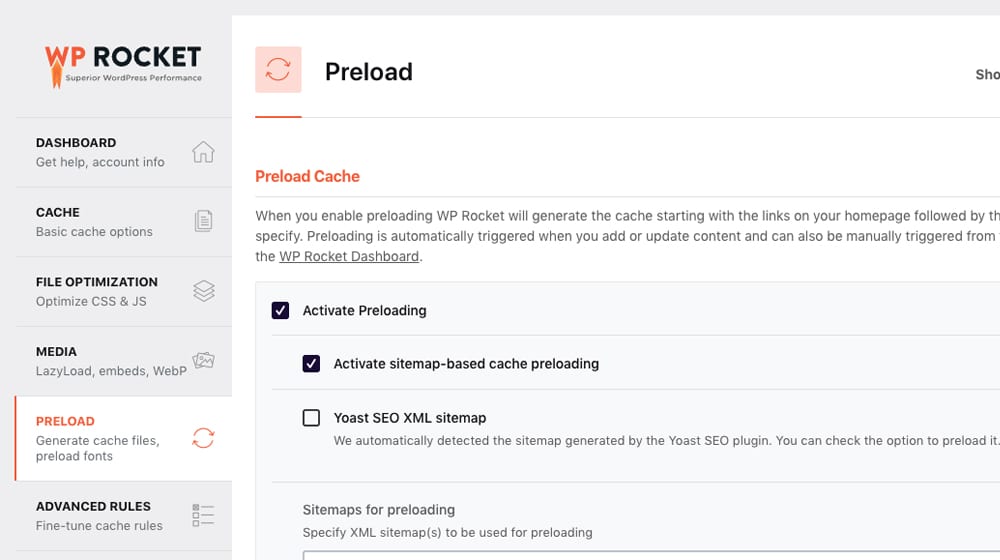
- One of the best things you can do for a website is set up caching. Caching allows pages to be generated and served much more quickly than if everyone had to fetch your site and wait for WordPress to pull every piece of data from your database. WP Rocket is one of the best caching systems I've seen for WordPress, mainly because it does more than just caching, eliminating the need for multiple plugins.
- Cache Preloading. Caching doesn't do a lot for initial page speed or Core Web Vitals if the visitor (or Google) generates the cache first. WP Rocket pre-generates caches whenever your pages change, so there's a cached version ready to go when a user visits for the first time. In my opinion, this is one of the best reasons to use WP Rocket, and where most other cache plugins fall flat (like W3 Total Cache and WP Super Cache). If you ever need to find an older version of a WordPress plugin, that's worth knowing too.
- GZip Compression. By compressing huge assets on the server and extracting them on the user's end, you save a ton of time that visitors would spend downloading giant blocks of code. This optimization is especially relevant if you have complicated plugins on your pages.
- Code Optimizations. Javascript and CSS files can take up a lot of processing time, and one of the keys to good a Core Web Vitals score is deferring them and combining them so that they don't delay initial loading. There are a lot of technical details I'm glossing over, but suffice it to say that WP Rocket follows modern best practices to condense, defer, and optimize your code without affecting functionality.
- Image Lazy Loading. Images have an enormous file size compared to text and scripts and take a comparatively long time to transfer and load. Smushing your photos helps, but you also need to lazy load them so that they don't get in the way of other site elements. More importantly, it would help if you did so without it affecting your Core Web Vitals, which WP Rocket handles. It's also worth considering whether blog post images are necessary for ranking when planning your content.
WP Rocket also works out of the box with most CDNs. Incidentally, using a CDN is another excellent idea, but it's familiar enough I'm not making it one of my five. Suffice it to say that you should always use a CDN if you can, but pick a good one.
2: Enable PHP-FPM and OPcache
PHP is a perfectly functional framework for running a website, but it's not exactly the world's most optimized codebase. There's a lot that can go wrong. It works fine for most small and mid-sized sites, but it needs something more optimized to avoid issues and downtime when a site gets larger.
PHP-FPM is FastCGI Process Manager for PHP. It's an advanced form of PHP developed primarily to help large, high-volume sites speed up and optimize their architecture.

Essentially, rather than running PHP scripts one at a time, it enables a "pool" of workers that run them concurrently, without conflicts.
"But James, my site's not a high-volume site. Why do I need PHP-FPM?"
Well, you don't, necessarily. But that doesn't mean you can't use it. Just because the tool is designed for larger sites doesn't mean you can't take advantage of it.
The trick is, you need to enable this with your web host, and not all web hosts support it. The best way to do this is with a dedicated server or a virtual private server, and it's unlikely that you'll be able to take advantage of it on a shared WordPress hosting package. If you're trying to get a high 90's or 100 scores on Google PageSpeed, you're going to want the fast server response time anyway. Doing that on a shared hosting account will be very difficult (unless you have a very lightweight website). If slow performance is also affecting your WooCommerce store's SEO, there are additional factors worth addressing.
Here's an example of how to enable PHP-FPM with one web host, specifically InMotion. Most web hosts that support it will have instructions similar to this. Be aware that you may need to change your PHP install, especially an older version, to ensure it works with PHP-FPM. On that note, the website speed benefits of upgrading PHP to the latest version are massive.
The other aspect of this is OPcache. OPcache is server-side caching for PHP, specifically OPcode caching. It takes your human-readable PHP and processes it down into faster, more efficient, computer-readable code called OPcode. That code is then cached to process and load much quicker than if your server needed to process your PHP every time.
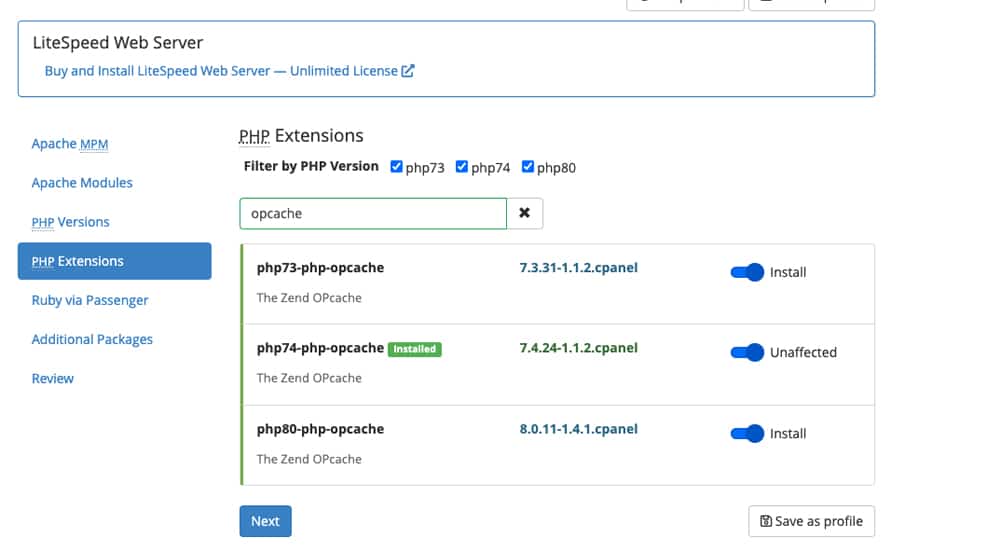
Many web hosts that use PHP 5.5+ should already have OPCache installed and enabled. However, it can be worthwhile to check and verify that it's working on your server and enable it if it's not. You can check by uploading a phpinfo file, visiting it in your browser, and doing a search for "OPcache." It'll tell you if it's enabled or not, and if the cache is getting any hits. If you're also seeing unexpected warnings in your WordPress dashboard, it may be worth learning how to remove the upgrade PHP warning in WordPress.
3: Use Cloudflare's APO
Cloudflare is one of those vast "invisible" companies that power enormous portions of the internet - but people who aren't webmasters aren't familiar with it or have any idea that it exists. In addition to DDoS protection and other services, they offer a CDN that is pretty much top-notch. Sure, Cloudflare has its share of drama and issues, but I've still found it to be an excellent service.
Most people are already familiar with Cloudflare for its advanced DNS-level features like minification, free SSL, and browser caching. More than "use Cloudflare" though, my specific recommendation is to use their APO.

APO stands for Automatic Platform Optimization. What is it, and what does it do? I can quote Cloudflare for this one.
"APO allows Cloudflare to serve your entire WordPress site from its edge network, ensuring consistent, fast performance for visitors no matter where they are. Automatic Platform Optimization is the result of using the power of Cloudflare Workers to cache dynamic content intelligently. By caching dynamic content, Cloudflare can serve the entire website from our edge network to make a site's time to first byte (TTFB) both fast and consistent."
Are you noticing a theme?
Here are a couple of notes about this one, especially if you're using WP Rocket.
- You'll want to disable the built-in Cloudflare add-on for WordPress. It's neat, but it conflicts with WP Rocket. You'll have to install the official Cloudflare plugin and use that plugin to clear your Cloudflare cache.
- You'll need to verify that it's working. Check your HTTP headers and look for "cf-edge-cache: cache,platform=WordPress". If you don't see it, APO isn't working. You may be able to disable and re-enable Cloudflare to get it to work; if that doesn't, talk to Cloudflare support for troubleshooting options. The "cf-edge-cache" tag may not show up for 10-15 minutes; it takes a while for them to store your pages on their servers.
- If you're using Cloudflare's Free plan, you'll have to upgrade to a paid plan to use APO.
Overall, APO for WordPress is a powerful tool, and Cloudflare's Edge Caching is really the primary reason to use Cloudflare in the first place.
The second reason is one of Cloudflare's newest features, Automatic Signed Exchanges (SXGs).
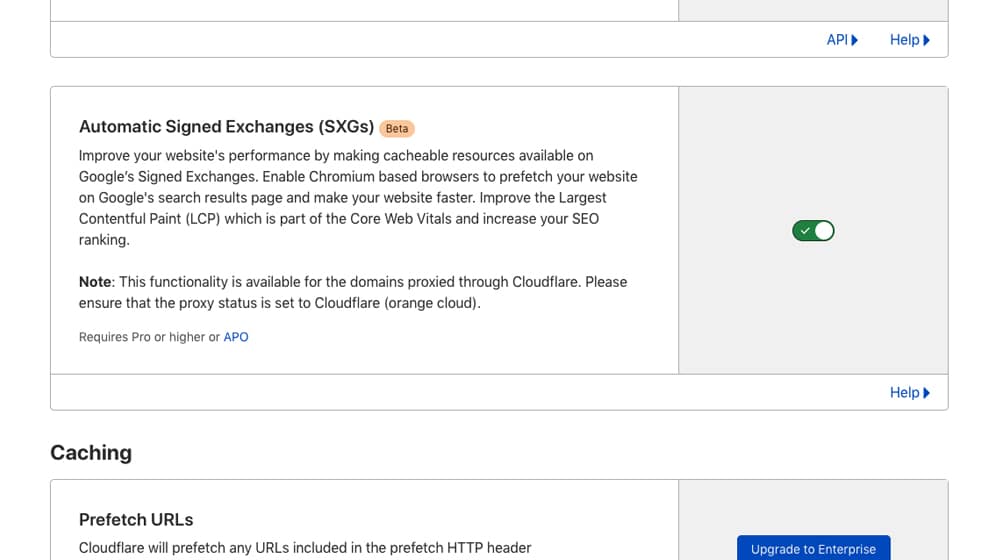
This feature enables Google to store a rendered version of your cached page on their servers, delivering it to visitors even faster. After enabled, it can improve your Largest Contentful Paint score and make your site function very similarly to how AMP pages work. It's a great way to get ahead of the curve with SEO, especially when all you have to do is check a box in Cloudflare.
4: Audit Your Plugins
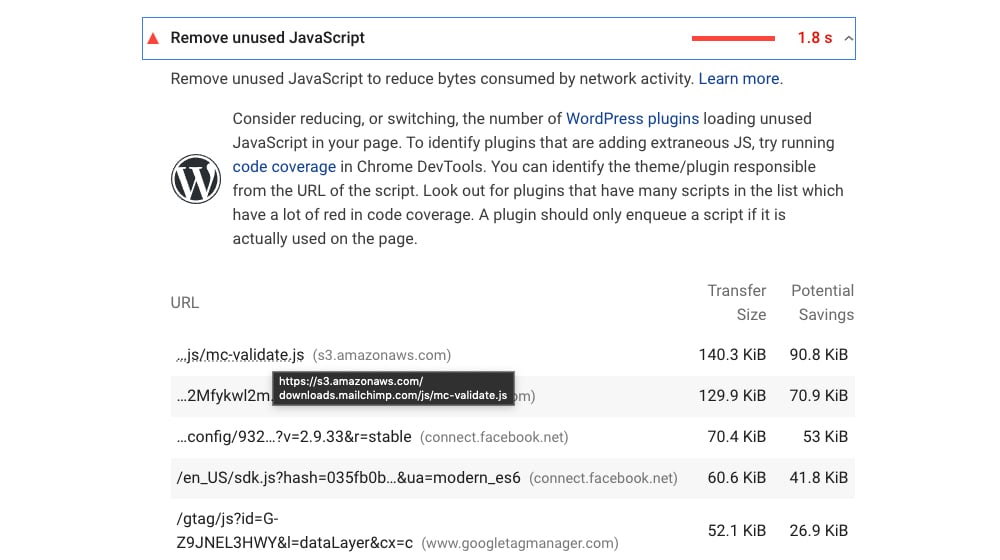
One of the more common advice to speed up a WordPress site is to cut down on plugins. More plugins mean more code, and more code means slower page loads, right? Well, not quite. I wrote a whole post breaking down the truth of the matter, but I'll summarize it here.
Some plugins can slow down your site, but others might not impact side speed at all, and others will speed it up. It all comes down to the plugin's purpose, what parts of the side code the plugin touches, and where it places its dependencies.
Greedy plugins (plugins made by developers who don't put much thought into their dependencies or how they interact with other plugins) will put their dependencies all over the place. Unfortunately, this can have a dramatic effect on your site speed in a negative direction.
Given that there are thousands upon thousands of WordPress plugins out there, not counting custom plugins you may have developed for your site alone, I can't list the plugins that you'll want to avoid. I give some tips for what kinds of plugins to look for in that linked post up above, but it's far from comprehensive.
You have three options for finding resource-hungry plugins.
1. Selectively disable and test.
Check your PageSpeed. Then, disable a plugin, and recheck it. Did your site speed metrics go up? If so, that plugin is slowing down your site. You can try to fix it, defer it, or replace it. Unfortunately, this method is tedious (especially if you have dozens of plugins) and can temporarily break your site in the meantime. You can clone your site and keep one noindexed version as a testbed, but that's an extra expense.
2. Cross-reference lists of known plugins.
A few sites out there like this one maintain lists of plugins that slow down sites. You can cross-reference your plugin list with a list like this and minimize the impact of plugins you find.
The trouble with this option is that you rely on the list to be comprehensive. Again, there are thousands of plugins out there, so there's no single list that is entirely comprehensive. You might have plugins slowing your site down that aren't on the list.
Additionally, some plugins slow down your site but provide necessary critical services. For example, that list above shows Yet Another Related Posts Plugin slows down your site. You don't want to get rid of related posts - they're too helpful for user experience, conversions, and bounce rate reduction - and it's unlikely that another related posts plugin will do any better. But, proper caching eliminates this problem. I have YARPP installed on this post, and my site scores in the high 90's without issues. Caching is key. If you're evaluating other plugins for similar reasons, it's worth checking out what to look for in a good WP plugin before committing to one.
3. Use another plugin to check what your plugins are doing.
Short of digging into server logs that you might not have access to, you can use other plugins to monitor your site and generate reports. Reading these logs can help show you plugins that are causing problems.
Two such plugins include:
- Plugin Performance Profiler
- WP Control
Using these will give you a good idea of what your plugins are doing and help identify problems you need to solve. By the way, if you know of another option beyond these two, let me know, and I'll add it to the list.
5: Use Custom CSS
I told you that I had spent dozens of hours optimizing my site, and a large portion of that time has been spent optimizing my CSS. Every last drop of speed I can squeeze out of it, I will. I'm very close to a 100/100 Google PageSpeed Insights score on mobile, and I'm going to do everything I can to hit it. Hitting 100/100 on the desktop checker is a lot easier.
What do I do?
- Inline CSS. WP Rocket does this automatically, but manually doing it is better and more comprehensive.
- Hide unnecessary elements. Especially with mobile sites, your site might try to load and then hide desktop elements, which gives you all of the speed issues with none of the benefits. Using the
visibility:hidden;attribute (as I describe in this post) helps prevent those elements from rendering when they aren't visible. Most mobile sites hide images designed for the desktop site, but those images are still being loaded, and on a slow mobile connection, that can hurt your page load times and PageSpeed mobile score quite a bit. If you're also concerned about how your images affect your rankings, our Image SEO Checker can help identify issues. - Fix CLS. CLS is a cumulative layout shift. Any time you see a web page that starts to load and then shifts elements around as other elements load, that's a layout shift. You want to minimize that by blocking out space for those elements immediately. You can read about it here.
These and other related issues are all best fixed with custom CSS. Unfortunately, many WordPress themes and frameworks don't handle CSS in a speed-first way, so you're going to have to go digging and tweak elements manually. It's also worth noting that stock photos and other media choices can compound performance issues if not handled carefully.
Extra Credit
If you're already using the tips above, here are a few advanced tips that may help you push your site from the low-90's to the high-90's on Google PageSpeed Insights:
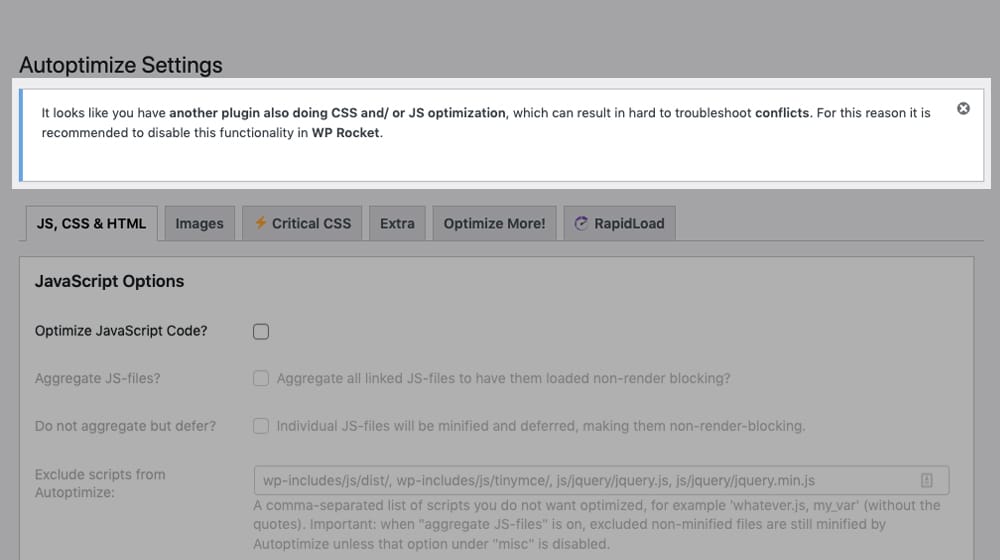
1. Pair WP Rocket with Autoptimize. It's generally not advisable to mix optimization plugins, and WP Rocket is especially sensitive to this, as it does so much and has a lot of room for conflicts. However, WP Rocket works well with Autoptimize, as it isn't a caching plugin. I like Autoptimize for a few reasons. First, it pairs with a paid service called RapidLoad, which reduces unused CSS more reliably than WP Rocket.
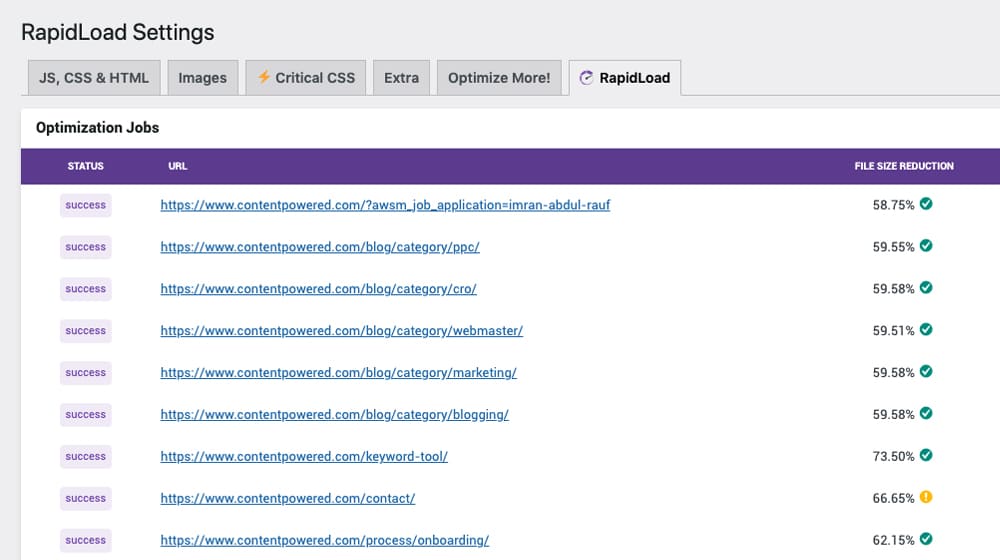
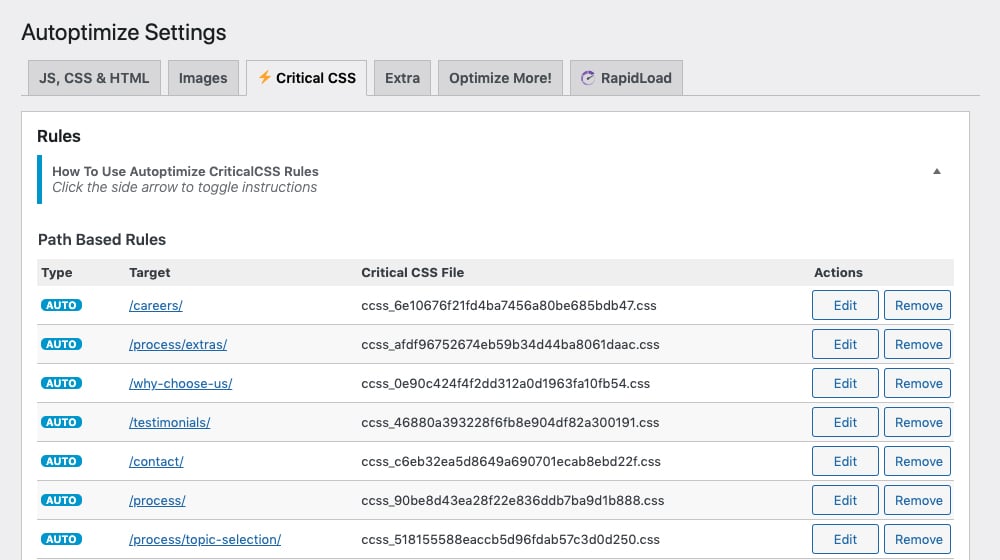
This WP Rocket feature is still in its beta phase, and I didn't get the best results. It removed CSS essential to my site, and there wasn't any easy way to allow those elements. RapidLoad is way more granular. Autoptimize is better at handling CSS in general compared to WP Rocket, though I prefer WP Rocket for JavaScript handling. I also like the Critical CSS add-on for significantly improving First Contentful Paint and Largest Contentful Paint scores.
Lastly, it does a few things that WP Rocket doesn't do as well, like optimizing and minifying your HTML and improving Google Fonts delivery.
2. Use HTTP2 Push Content or WP Plugin Manager. These plugins can help you remove JavaScript files from specific pages.
For example, if you have a slideshow plugin on your "Gallery" page, but that plugin is being loaded on your homepage for some reason, you can use these plugins to remove the code from every page where it is not needed.
3. Use Imagify. There are quite a few image optimization alternatives to Imagify, but I like it because it's from the same creators of WP Rocket and plays nicely with it. I'm also grandfathered into an earlier $5/mo plan. Imagify helps optimize every image on your site and converts them to WebP, or as Google it, "Next-Gen Image Formats." It will even convert your WordPress theme images in addition to your uploads folder.
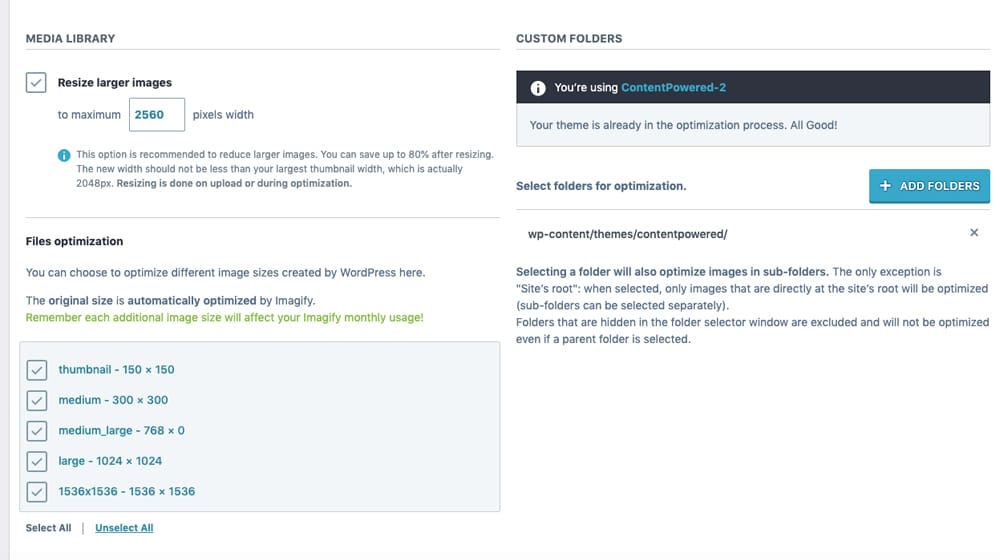
It backs up the original jpeg and png files if you ever want to roll back, and you can choose your optimization level. It'll even resize images for you automatically. It's a set-it-and-forget-it plugin to boost your score.
I had a hard time moving from the low 90's to the high 90's, and Autoptimize paired with WP Rocket is what got me there. It's not perfect out of the box and takes some tweaking, but it's a great combo.
Be careful that you don't have any conflicts by enabling similar features on both. What's strange Autoptimize was throwing a warning that there could be a potential conflict, even though CSS optimization was disabled in WP Rocket. It's something to be mindful of if you see a similar warning.
Lastly, triple-check your site to make sure everything is loading smoothly, and adjust your CSS if necessary. The "RapidLoad" feature did a great job (99% perfect), but I did have to adjust some parts of my theme's stylesheet. Making my element selections more specific fixed these issues (example, instead of #calltoaction, try something more granular like .single .footer #calltoaction).
It's a pain to tweak your site at a high level like this; you'll do a lot of cache clearing, OPcache purging, Cloudflare cache clearing, and rebuilding of your critical CSS. Once it's optimized, though, you can leave it alone and get back to focusing on creating content.
Your Turn
Now, I offer content marketing services, but I also like my clients to show tangible results, so I often do SEO work. I write about it to help you optimize your site yourself, but if you want someone to handle it for you, consider giving me a call. I won't just do some SEO for you, but if you want me to run your blog, I'll make it run well as I do - you can check out some client results to see what I mean. Otherwise - well, I've given you the homework; it's your turn to start optimizing!
Written by James Parsons
Hi, I'm James Parsons! I founded Content Powered, a content marketing agency where I partner with businesses to help them grow through strategic content. With nearly twenty years of SEO and content marketing experience, I've had the joy of helping companies connect with their audiences in meaningful ways. I started my journey by building and growing several successful eCommerce companies solely through content marketing, and I love to share what I've learned along the way. You'll find my thoughts and insights in publications like Search Engine Watch, Search Engine Journal, Forbes, Entrepreneur, and Inc, among others. I've been fortunate to work with wonderful clients ranging from growing businesses to Fortune 500 companies like eBay and Expedia, and helping them shape their content strategies. My focus is on creating optimized content that resonates and converts. I'd love to connect – the best way to contact me is by scheduling a call or by email.


April 28, 2022
Thanks, I'll try these out!
April 29, 2022
You're welcome, Steven! Report back if you get stuck or if you need pointing in the right direction 🙂
September 21, 2022
WP Control is super handy. I found a couple of plugins slowing my site down.
October 07, 2022
Thanks for sharing!
June 29, 2023
Hi James, Great post! Helpful explanations.
I use several of these listed plugins for my company, Express Legal Funding's website, and blog. WP-Rocket and Rapidload have been game changers for getting my PageSpeed scores up to 99 on Desktop and about 95-96 on Mobile. Optimizing the javascript and CSS is crucial.
Have you checked out RapidLoad version 2.0? So far, I have been running into some issues and have yet to see the value in the add-ons, as I am using WP-Rocket.
July 10, 2023
Hey Aaron!
WP Rocket's "Remove Unused CSS" has been in beta for a long, long time, but it's finally the default feature on WP Rocket, and it seems that it's no longer in beta.
There may be a time soon when it is better and more reliable than the Rapid Load plugin.
For the most part, though, it's always been unstable and unreliable and has had a lot of bugs. It removes parts of your site that you don't want it to remove and can break navigations, dropdowns, and other critical functionality.
For now, I'm still using RapidLoad on the latest version! But there may be a time when I switch over to WP Rocket's "Remove Unused CSS" feature if it continues to get better.
This is a tough feature to roll out, something that programmatically determines which CSS is essential and which is to be removed on a page-by-page basis. It's super impressive that this technology exists and that they make it so easy to use.