WordPress Tables: 5 Ways to Add Tables to Your Blog Posts
Written by ![]()
Have you ever thought about tables?
No, I don't mean the table you use to eat dinner with the family or the conference table at the office where meetings are held.
I mean tables as in charts of data, displayed in columns.
When writing content, sometimes it can be a challenge to present data in an organized way. You may want to display it in a chart format, but the easiest way is to make it an image. Unfortunately, images have a lot of different drawbacks, not the least of which is the inability of Google to index the information in the table. Chart images aren't good for SEO!
On the other hand, presenting information that you would display in a table without unique code can be messy or tedious.
The messy version looks something like this:
- Day - Name - Sales
- Monday - Shaun - $500
- Monday - Dave - $400
- Tuesday - Steve - $500
- Wednesday - Jennifer - $800
- Wednesday - Sierra - $750
And so on. You don't have nicely organized columns, you don't have formatting, and it all just kind of runs together. The information is there, but it's not well-formatted. You can sometimes add spaces and alignment using tabs or CSS, but you're getting into hacky ways to format data.
HTML has native support for tables, of course. It isn't easy to create and keep updated, though. The tedious way is to use HTML code to create table content manually.
- First, you need the table tags, so "table" to start and "table" to close.
- Inside that, you need code for each row. A row starts with a "tr" tag and ends with a "tr" tag.
- Inside each row, each cell needs a table data entry. So, a "td" tag to open and close, with the specific element of data inside it. The first ones are the header titles for those columns.
So for the very first row of information, the headings, in my example above, you're looking at:
<br> &amp;amp;lt;table&amp;amp;gt;<br> &amp;amp;lt;tr&amp;amp;gt;<br> &amp;amp;lt;td&amp;amp;gt;Day&amp;amp;lt;/td&amp;amp;gt;<br> &amp;amp;lt;td&amp;amp;gt;Name&amp;amp;lt;/td&amp;amp;gt;<br> &amp;amp;lt;td&amp;amp;gt;Sales&amp;amp;lt;/td&amp;amp;gt;<br> &amp;amp;lt;/tr&amp;amp;gt;<br> &amp;amp;lt;/table&amp;amp;gt;<br>
Then, of course, you need to add tags for CSS formatting or HTML formatting, and if you need images or icons, you have extra work, and that's all just for one row. Imagine having to mess with all of that manually! There's a reason that tables were universally disliked for web design and are no longer the standard.
Luckily, we haven't needed to manually write HTML tables in decades if we don't want to. WordPress offers many different ways to add new tables, and I've picked the five I think are the best for this step-by-step tutorial.
Let's dig in!
Key Takeaways
- Using table images hurts SEO because Google cannot index the data contained within them.
- WordPress's built-in Gutenberg table block is free but lacks advanced formatting, pagination, and column-level styling options.
- TablePress allows one table to be embedded across multiple pages, with edits automatically updating every instance simultaneously.
- Data Tables Generator is the most feature-rich option but is overly complex for bloggers needing simple comparison tables.
- Affiliatable is designed specifically for affiliate marketers, offering product comparison tables, pros-and-cons boxes, and geotargeting features.
Option 1: WordPress Default Tables
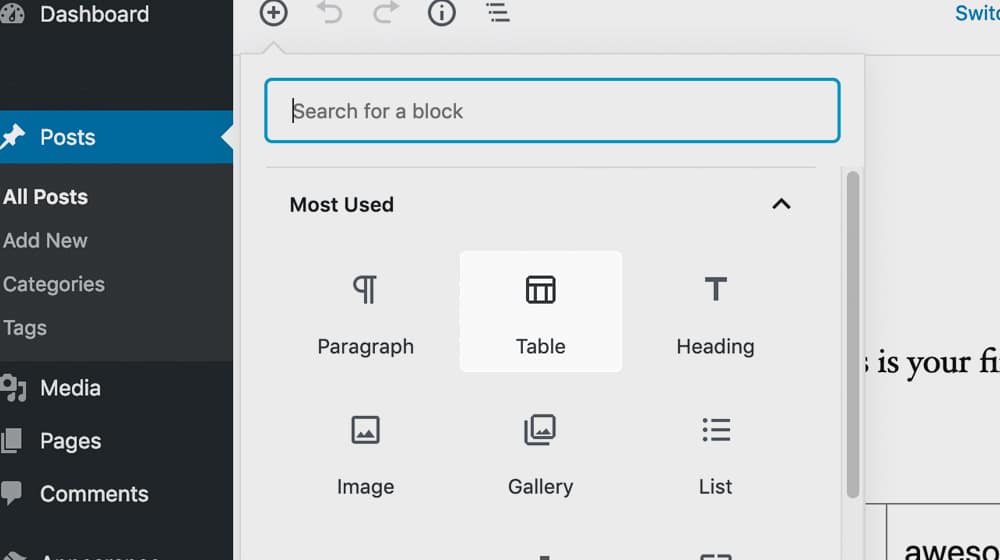
Did you know that WordPress allows you to add a table? It turns out it's free and pretty easy, though it doesn't have many features. In the Gutenberg drag and drop page builder, you can click to add a new block and choose the Table block. It will insert a block that serves as a table options configuration box. If you're using the Classic Editor, you'll have to switch back to Gutenberg to use the table builder on the front-end.
It's pretty simple; choose the number of rows and columns you want. For my data example above, I'd have three table columns and however many rows for data I need. The end result are simple responsive tables.
WordPress also only has a couple of options for a table by default. You can choose between rows separated by thin lines or rows differentiated by alternating striped backgrounds, but that's it. There's no formatting for columns, and while you can set the background color, it applies to the whole table, not just a cell/row/column. If you're looking for advanced options, the default tables won't be much help to you.
Now, sure, you can go in with CSS and change anything you want manually. That's fine! But, if you're trying to make a table look the way you want it in your WordPress editor, it's a huge hassle. WordPress's support for tables is surprisingly lacking, given how much else they allow you to do out of the box. For example, if you have thousands of rows in your table, it won't create pagination to split this into a smaller section that's easier to read.
That's where installing a WordPress table plugin comes in.
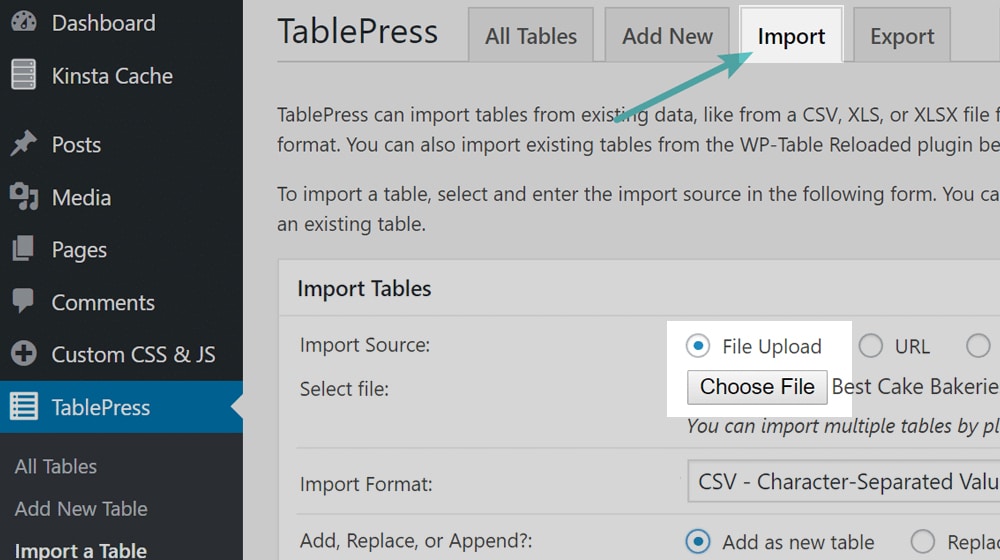
Option 2: TablePress
If you've had a WordPress website for a while, it should come as no surprise that pretty much any feature you want to add probably has an add-on named FeaturePress somewhere. Tables are no exception. TablePress can be found in the free plugin directory or on their website TablePress.org.
TablePress is a bit clunky because it works in a way that facilitates a central hub for managing table data. It adds a table management mini-app to your WordPress dashboard. In that management app, you can create tables, import or export tables, configure tables, and generally do whatever you want to them. Then, when you want to insert tables into your blog posts, you use a table shortcode to pull in that table.
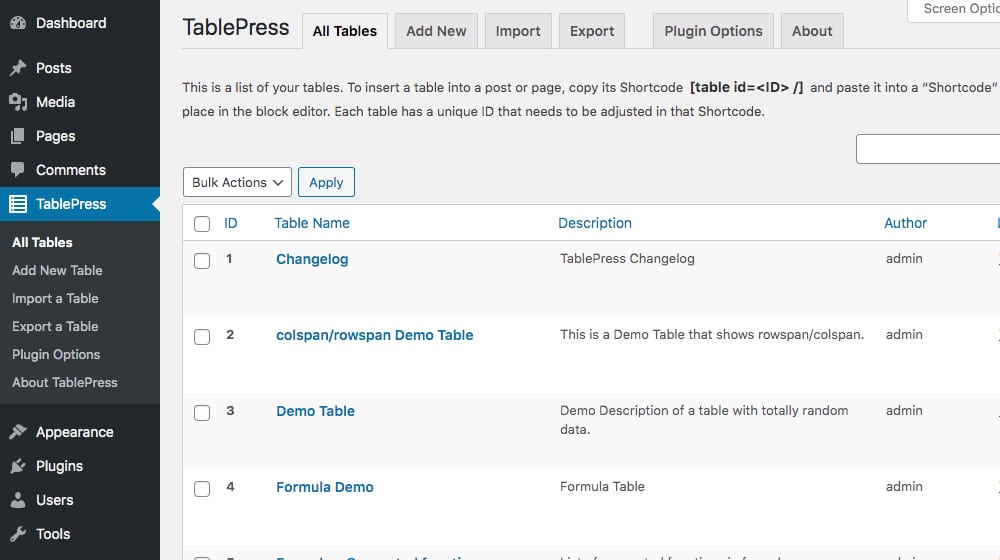
You'll have to click "Save changes," copy the shortcode, then go back to your post to preview how it looks. Sometimes you'll have to bounce back and forth between the post editor and the TablePress settings, which can get tedious. If you're looking for better ways to track content updates in WordPress, that's worth exploring separately.
Then - and this is important - if you need to edit the table data, you can do so from your dashboard. One edit immediately populates across all of the different instances of that same table. Since it's embedded data, centralized management is easy.
You can also import data directly from a CSV, XLS, or another spreadsheet file, and it will populate a table. This import feature is super helpful if you have a ton of data you want to import and don't want to copy it manually.
The biggest downside to this table plugin is that it's best used for data and spreadsheets. It's not made for, for example, a side-by-side product comparison chart, a table of contents, or something slick with just a few rows and columns. Think of it more for embedding dozens or hundreds of rows of data.
It would help if you used custom CSS to style and alter the table. It makes it easy to do, but you still need to know your way around CSS to style the table. On the plus side, it's completely free and easy to use, which makes it a good plugin for beginners to start with. If you're just getting started, you might also wonder whether weekly blog content is still worth the effort.
Option 3: Ninja Tables
Ninja Tables is a slick option for table creation and data management on a WordPress site. It's meant more for data-heavy blog posts than for casual use, and it does a lot of things that support volumes of data. For example, your table can have filters and sorting options for users to sort and adjust the data you display dynamically. That's pretty useful for many stats and information, but less so for a product comparison chart.
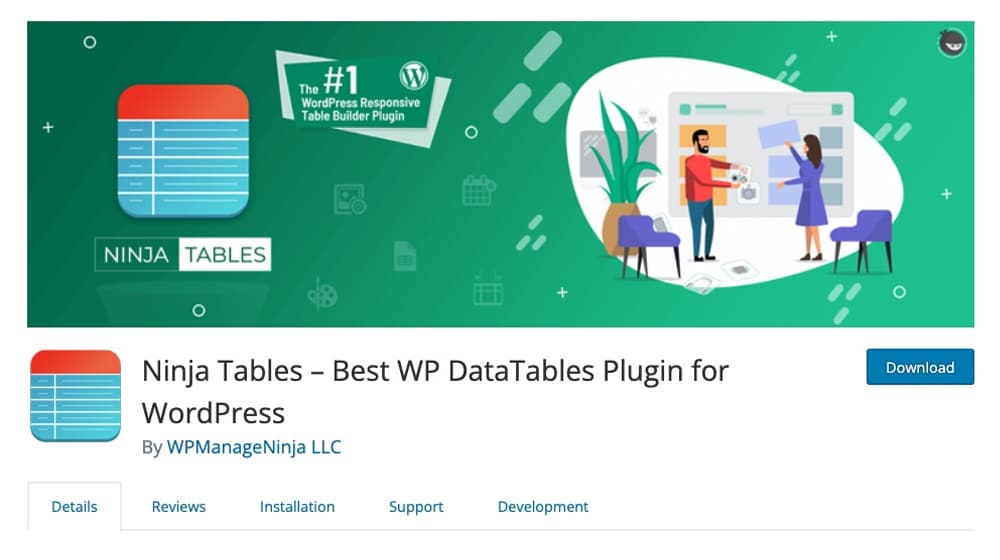
One of the slickest features of Ninja Tables is that it's very user-friendly. You don't need custom CSS or coding to manage the look and feel of your tables. You don't even need to do a lot of data entry if you don't want to; you can import data directly from files of varying types.
However, one downside is that options are "limited" with the free version. I put limited quotes because they have many options; it's just not entirely free. They have dozens of different styles and colors to pick from and different templates you can use. If you need to reformat text for your table cells, a text case converter can save you a lot of manual effort.
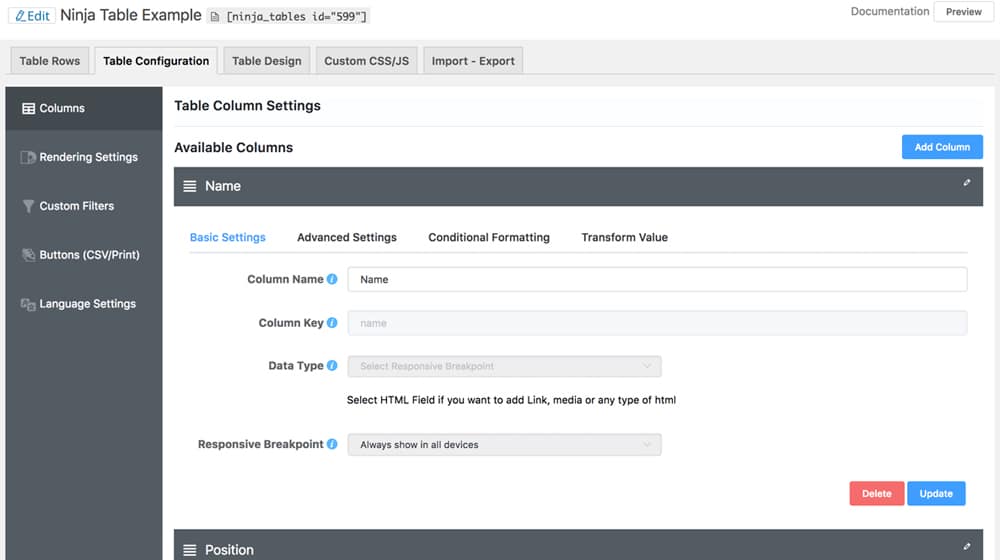
Ninja Tables also allows you to create and edit your table from the block editor directly in a post or manage it from a central dashboard the same way TablePress does. You're pretty free to do what you want with the plugin.
You can find the free version of Ninja Tables in the WordPress plugin directory. Like many plugins, they also offer a premium version if you want to buy it from their website.
Premium gives you a bunch of additional functionality you'll probably find helpful, including:
- The ability to add media elements to your cells instead of just text data.
- A color picker, so you're not limited to just the colors they have preconfigured for you.
- More options for importing and exporting data or syncing with Google Sheets.
- Conditional formatting options and advanced data filtering.
- Using shortcodes inside table cells.
A single-site license is $49 per year, or you can pay $99 for 20 sites or $199 for unlimited sites. Alternatively, they offer lifetime licenses for $199 for one domain, $399 for 20, or $599 for unlimited. Other than the number of domains you can use it on, the plans have no limitations, so all paid versions are identical. You can browse the site and see more features here.
Option 4: Data Tables Generator
Do you like features? Do you wish you had more of them? Would you love to have a data table that you can dynamically convert into charts, graphs, bars, pies, PDFs, and other exports? Do you want to display media in your table? A search bar? A drop-down to choose how many rows display? Sorting by column for every column? Responsive design?
Alright, I'll stop.
Like TablePress, you manage your tables from a dashboard and embed them in your WordPress posts or pages. This plugin is very much the table plugin for the STEM major who starts to vibrate with excitement when they see a good pile of fresh data and very much not for the marketer who wants a fire-and-forget table that has half a dozen rows and a star rating. It's also very complicated because it has a million different options.
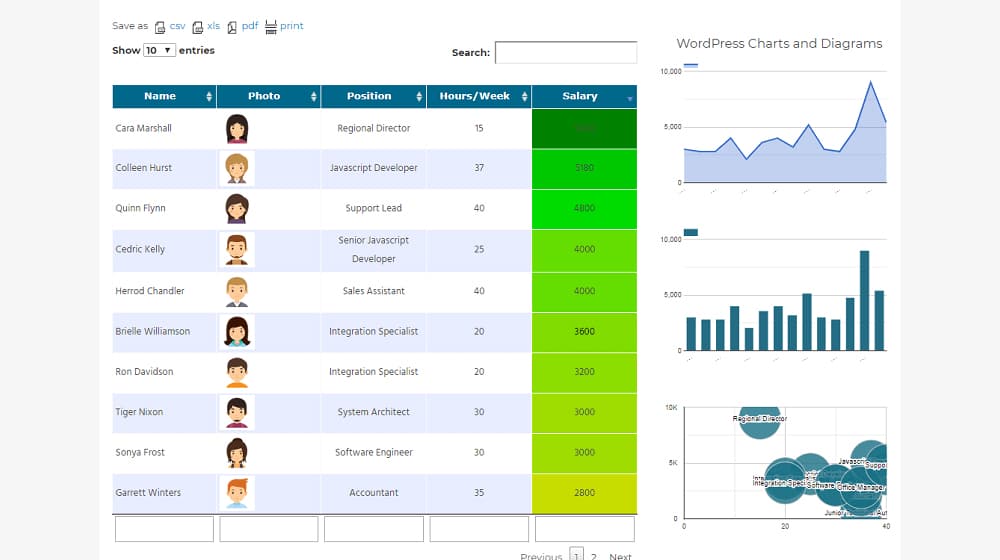
When I say this can do everything, I mean it. The Data Tables Generator dashboard for editing a table looks like if you took Excel or Google Sheets and just embedded it into the editor. It has space for formulas and formatting and a ton more. It has anything you could want. In some ways, it's the best WordPress table plugin simply because it has the most features.
So what's the catch?
The complexity, of course. It's very robust for a data-heavy site, but if you're a smaller WordPress blog and you only want a chart to compare yourself to your competitors, a pricing table with different plans and features, or a product comparison table for something you sell; this is about as much overkill as using a cruise missile to till your garden.
You can get the free version here from, you guessed it, the WordPress plugin directory. If you ever need to roll back to an earlier release, you can learn how to find an older version of a WordPress plugin.
The paid version is, fittingly enough, priced in table form.
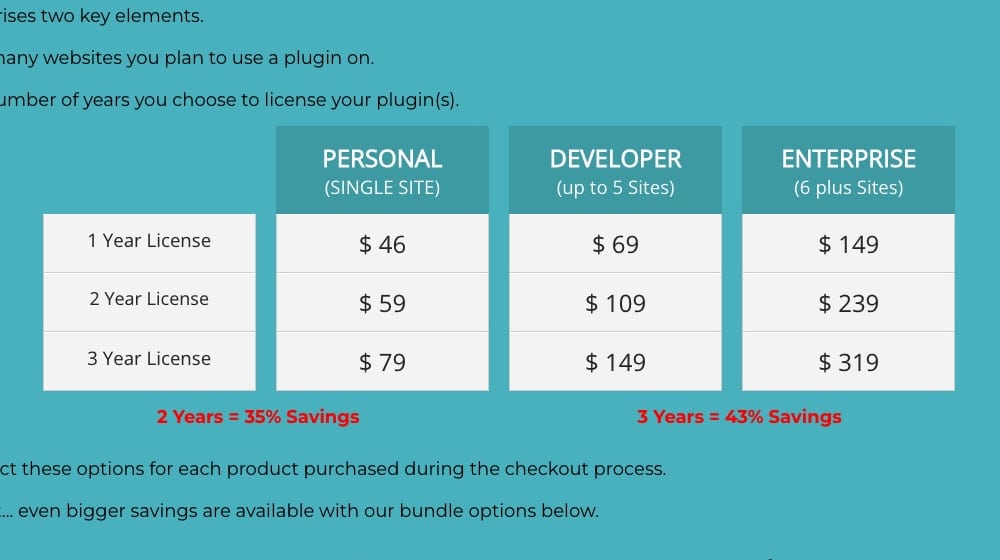
The Data Tables Generator website has licenses for one, two, or three years and for one, five, or 6+ sites at a time. A single-site license for one year is $46.
Option 5: Affiliatable
Most of the above options are about displaying large amounts of complex data in tables, but what if you don't want something so complicated?
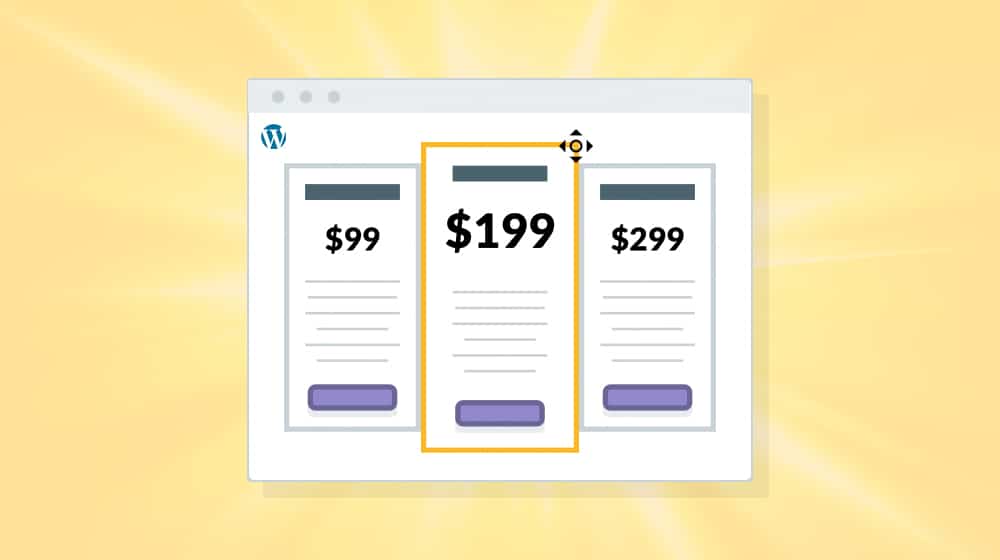
Most bloggers who want to add tables are likely going for something like a product comparison table. You have two or three products, and you want a table that runs down various features/pricing/reviews information for them, with affiliate links to buy them. It's a tried-and-tested strategy for affiliate marketing and product sales. Just show off the product's features so that a user can use them to decide between them, and they'll be more likely to pick one of them. If you're also looking to sell products on your blog, this approach pairs well with a broader strategy.
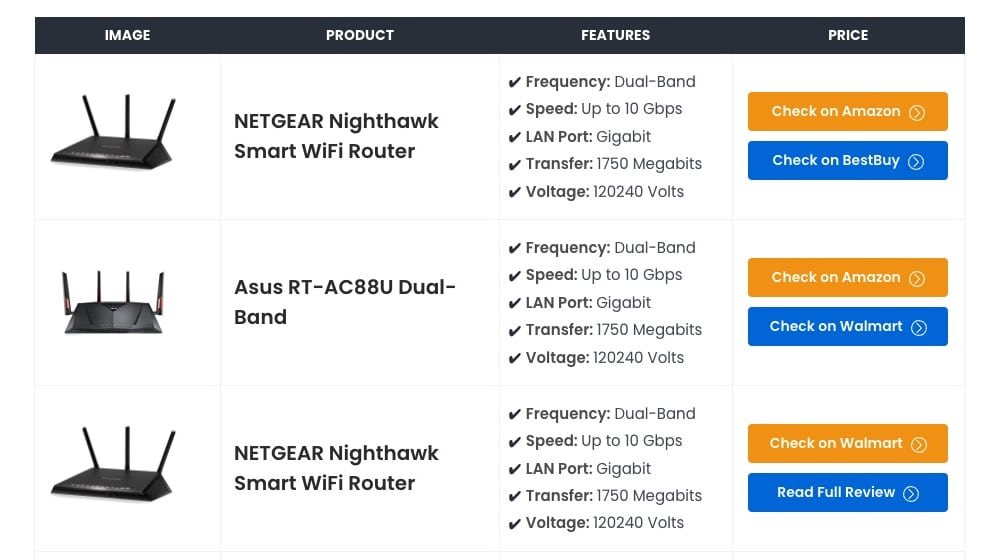
Affiliatable is one such way of adding these tables. It has comparison tables, a "top 3 box" format, individual product details boxes, and a pros-and-cons box style. More importantly, it has some marketing features rather than data management features. Users don't need to be able to sort or search a product comparison table, but they can certainly benefit from a little geotargeting on your end, right?
Affiliatable has three versions:
- A free version
- A pro version for a single-site license
- A pro version for unlimited sites
The free version is acceptable but limited; it doesn't let you use premium templates, it's not optimized for Schema, and it doesn't let you use custom categories. If you want to add structured review data to your product pages, you'll need to look elsewhere. The paid versions are $39 per year and $89 per year, respectively, or you can buy lifetime licenses for $199 or $399.
What do you think? What's the best way to add a table to your blog posts? Let me know in the comments if you have another great suggestion.
Written by James Parsons
Hi, I'm James Parsons! I founded Content Powered, a content marketing agency where I partner with businesses to help them grow through strategic content. With nearly twenty years of SEO and content marketing experience, I've had the joy of helping companies connect with their audiences in meaningful ways. I started my journey by building and growing several successful eCommerce companies solely through content marketing, and I love to share what I've learned along the way. You'll find my thoughts and insights in publications like Search Engine Watch, Search Engine Journal, Forbes, Entrepreneur, and Inc, among others. I've been fortunate to work with wonderful clients ranging from growing businesses to Fortune 500 companies like eBay and Expedia, and helping them shape their content strategies. My focus is on creating optimized content that resonates and converts. I'd love to connect – the best way to contact me is by scheduling a call or by email.


Comments