How to Automatically Add a Disclaimer to Every Blog Post
Written by ![]()
Blogging online has a lot of rules associated with it. Some of them have to do with Google and SEO, some are terms of service for social networks or web hosts, but some of the most important are the laws of the land. Federal and state laws and regulations often necessitate specific considerations, especially for particular industries.
One such regulation is the need for disclaimers. Some bloggers out there need to have disclaimers on most or every post they write. The penalties can be severe if these disclaimers are left out, but writing in a new disclaimer for every post gets tedious.
So, how can you automate this process and handle it without spending time every time you have to write a post?
Key Takeaways
- Bloggers using affiliate links must include disclaimers per FTC guidelines or risk fines up to $44,000 per occurrence.
- Industries like law and medicine require disclaimers because incorrect advice can cause serious legal or physical harm.
- WordPress users can save reusable blocks containing disclaimer text, with edits automatically reflecting across all posts.
- The "Insert Blocks Before or After Posts Content" plugin automatically adds disclaimers to every post without manual effort.
- Google won't penalize sites for duplicate disclaimer text, so there's no SEO reason to avoid adding them.
Why You Might Need a Disclaimer
First of all, let's talk about the reasons you might need a disclaimer. I know some of you out there need them and don't use them, and you're putting yourselves in a dangerous position by not including them. Worse, you might not even realize it.
Generally, there are two reasons why you need a disclaimer.
Reason 1: You use affiliate marketing links.
Affiliate marketing links are links that, when clicked, allow you to earn a commission from any purchases the user makes after clicking. It might be immediate, one-time-only, and for the linked product only. Or it might be general use, like Amazon flagging a user for commissions on anything they buy in a certain period after clicking.
Affiliate links are, technically, a form of advertising. Or, instead, they're a form of monetization that relies on surrounding advertising. You're not going to be using an affiliate link if you're not trying to promote the product, and promoting a product means you have a financial tie to it, which means there's a potential conflict of interest.
If I tell you that such-and-such a product is excellent, and then I link you to it, if it's a standard link and I don't make anything out of it, you can trust that I'm telling you the truth. At least, most of the time. More on that in a moment.
Conversely, if the link earns me money, you can recognize that maybe I'm glossing over the downsides a little or embellishing the upsides of the product to sell more and make more money. It's a financial interest, and by not telling you, I'm hiding it.
That first situation, by the way, can be further muddled by sponsorships. If I'm linking to paying me to advertise them, I don't have to use affiliate links; I just pull in the paycheck.
(I don't do any of this, by the way. My site is free of both disclaimers and affiliate/sponsored content, and I'm honest with my readers about what I'm promoting. I sell content marketing services, not the services of others.)
In both cases, this is a financial connection between the content author and the product being sponsored. It makes the content advertising, and thus, it needs to be disclosed with an affiliate disclaimer. This law is a rule enforced by the FTC guidelines (Federal Trade Commission) to help enforce transparency online and keep truth and honesty in advertising. You can read more about this here.
Penalties for not disclosing an affiliate connection with an affiliate disclosure statement can be steep and include:
- Orders to cease the behavior.
- Fines of up to nearly $44,000 per occurrence.
- Potential injunctions from civil courts.
- Additional penalties of up to $41,000 per occurrence in civil court.
- Further penalties for violations of the injunctive order.
- Potential lawsuits and damages in egregious instances.
On top of that, the affiliate program you're using can ban you from their service for violating federal regulations.
Reason 2: You operate in an industry with regulations.
The other reason your site might need a disclaimer is if you operate in an industry that has specific regulations on what you can and can't do with your influence.
The two most prominent examples of this are IANAL and IANAD: I Am Not A Lawyer/Doctor.

Lawyers typically avoid giving legal advice for a few reasons:
- They want to have a formalized relationship so that their advice can earn them money.
- They don't have all the information about a situation, so advice can be incorrect due to factors they don't control.
- They don't want to be open to or liable for issues if someone acts on their advice and thinks they're their lawyer when they aren't.
- They want to avoid allegations of malpractice.
Lawyers are also only licensed to practice law in specific jurisdictions and in specific areas. For example, a personal injury attorney should not be giving advice on copyright law, and an attorney in Texas can't give legal advice that's relevant in California. Doing so can get them disbarred. Now, it's pretty unlikely that a law firm writing a blog post about copyright law will get disbarred for not having a disclaimer, but it's still a risk.
The other arena is healthcare. Doctors avoid giving medical advice when they don't know the complete specifics of a situation, the drugs involved, the conditions involved, etc. This situation is also why supplements that the FDA disapproves will have to call themselves supplements and not medications, and why claims of effectiveness have to have disclaimers attached. Generally, since correct medical advice is vital and wrong advice can tangibly harm or kill someone, disclaimers are essential and legally enforced. And, of course, Google tries to avoid showing poor medical sites, according to their "Your Money, Your Life" updates. Social media sites are also aware of these laws.
So, if you're in a niche where you need to add disclaimers or use a monetization strategy that requires it, how should you go about it? You have several options.
Option 1: Save a Reusable Block
If you use WordPress, and you use the Gutenberg block editor rather than the classic editor, you have the option to save a block. A saved block is just a piece of saved content that you can insert as you would with any other block in a post or page. Here's what you do to use this for a disclaimer.
Start by writing your disclaimer text. A disclaimer doesn't have to have a lot to it, and it can be as simple as a single line, like:
"This post contains affiliate links. If you click one and make a purchase, I earn a small commission at no extra cost to you. It helps support the site so I can continue to offer great content to you!"
Write the content, format it how you want it, then click on the block. The block options bar pops up, which has your formatting options and so on. Click the three dots, and click "Add to reusable blocks."
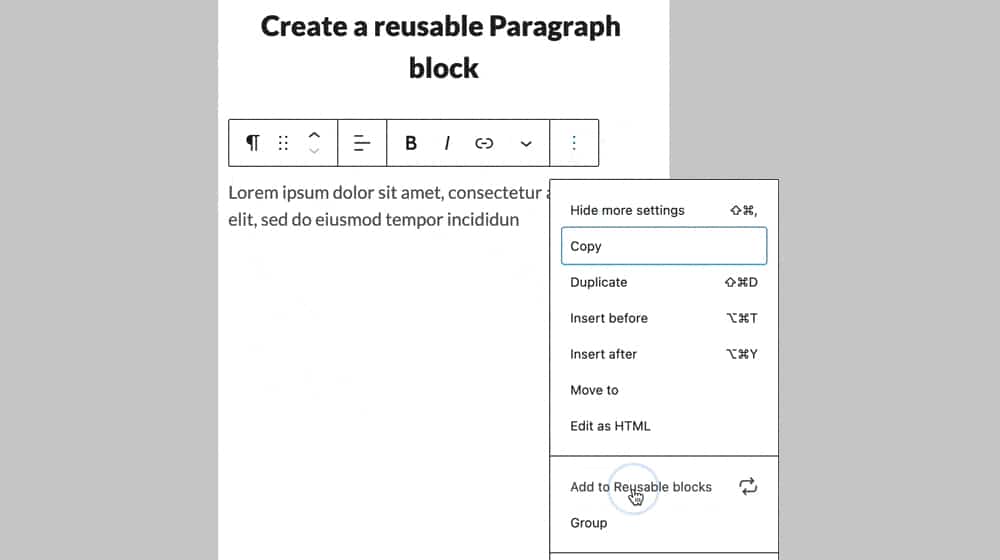
Reusable blocks will convert from whatever was before (probably a paragraph block) to templates that you can insert effortlessly in the future. Give it a name in the sidebar panel, something you'll remember like "Disclaimer," and save it.
This strategy has one significant benefit: every instance of that reusable block across your site is saved as that one block. If you need to change your disclaimer, you can edit the reusable block, and the changes will reflect across your entire site. This is especially useful if you want to track content updates across WordPress efficiently.
Here's the WordPress step-by-step guide for this process, with gifs to show you how it's done, as well as additional tutorial information for multi-block blocks, exporting blocks, and more.
This process is easy and convenient, but it's not automatic, which is the entire purpose of this post. It just so happens to be the most popular method, but if you have hundreds or thousands of older posts, you'd have to edit each post manually.
So, how can you apply this to all of your blog posts automatically?
Option 2: Use a WordPress Plugin
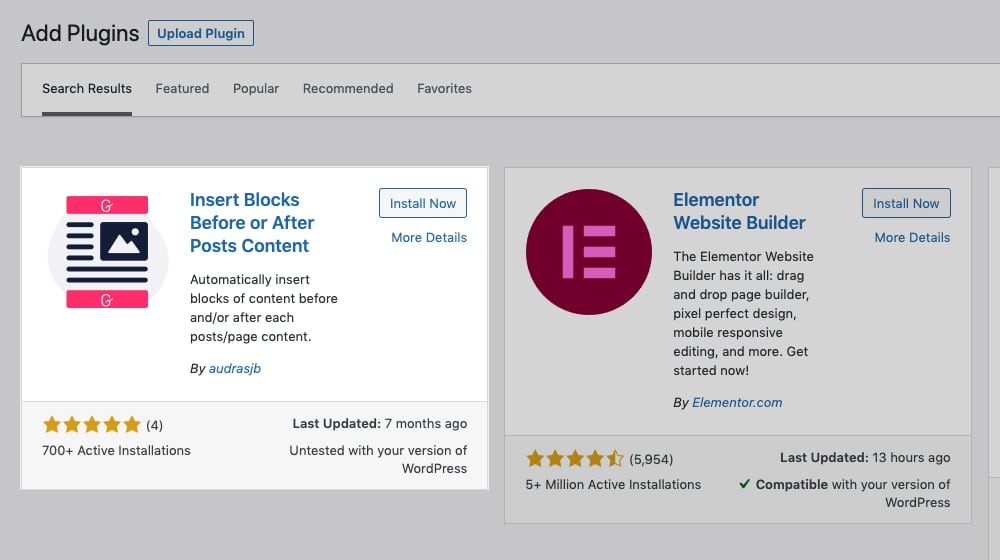
In this case, I have one specific plugin in mind, and it's called Insert Blocks Before or After Posts Content. I know, not a very catchy name, but it does the job.
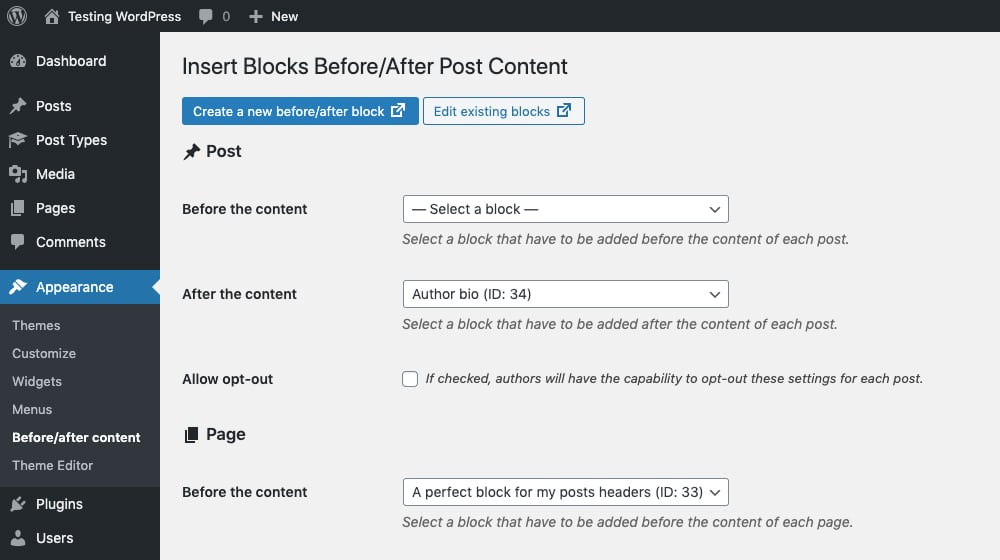
This can use a process similar to the one above and make it automatic. It works by inserting content automatically into the header (or footer) of your content. So, here's what you do.
Start by installing the plugin in your WordPress dashboard by clicking "Add New" on your plugin page. You should know how to do the rest by now if you have a WordPress blog, but if not, here's a beginner's guide.
Once the plugin is installed, you'll want to go into the settings (Appearnce > Before/after Content) and create the code block that you'd like to be inserted before every new blog post. You can wrap it in paragraph tags or italicize them in HTML, which seems to be pretty standard for most blog post disclaimers. You can even style it with CSS.

You can also create a block that you can append using Gutenberg's block editor if you'd prefer to go that route instead. Here are a couple of ad inserter plugins that can expand on Gutenberg's block functionality for trickier site layouts and advanced disclaimers:
- Reusable Blocks Extended is a plugin that expands what you can do with a reusable block, including more widgets and embeds, shortcodes, and even PHP code in your blocks. Useful for power users but not necessary for something as simple as a disclaimer.
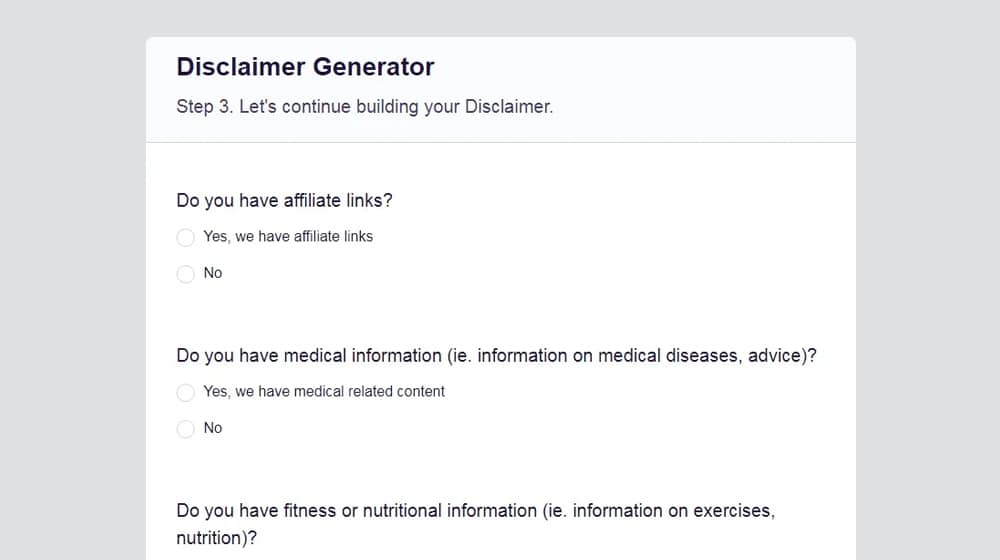
- Free Privacy Policy Generator is a site that runs you through a quick questionnaire and generates a disclaimer, privacy policy, or EULA based on your answers. If you're stumped on how to write your disclaimer, this can help.
Once you've configured your block, go to the Insert Blocks Before or After Posts Content dashboard. Use the drop-down for either above content or below content, and choose the block that you want to insert before your content. Save your changes, and that's it; you're good to go. This process will automatically insert the block in your posts without you needing to do anything other than writing your article as you usually would.
The other option you have is to change the format of your disclaimer. You can add the information to your sidebar or a pop-over banner like the GDPR "this site uses cookies" banners or a Hello Bar-style banner. These are all valid options but might not quite fulfill the need to have a disclaimer visible at all times. You'll need to configure them to be persistent, which can hurt usability and the user experience.
Also, if you're not using WordPress, you might have a more challenging time with things.
For example, Squarespace users need to use a plugin to use reusable blocks, but that plugin is somewhat expensive. You can get a 10% discount by signing up for their email list, though, which brings the total down to about $61.34 USD.
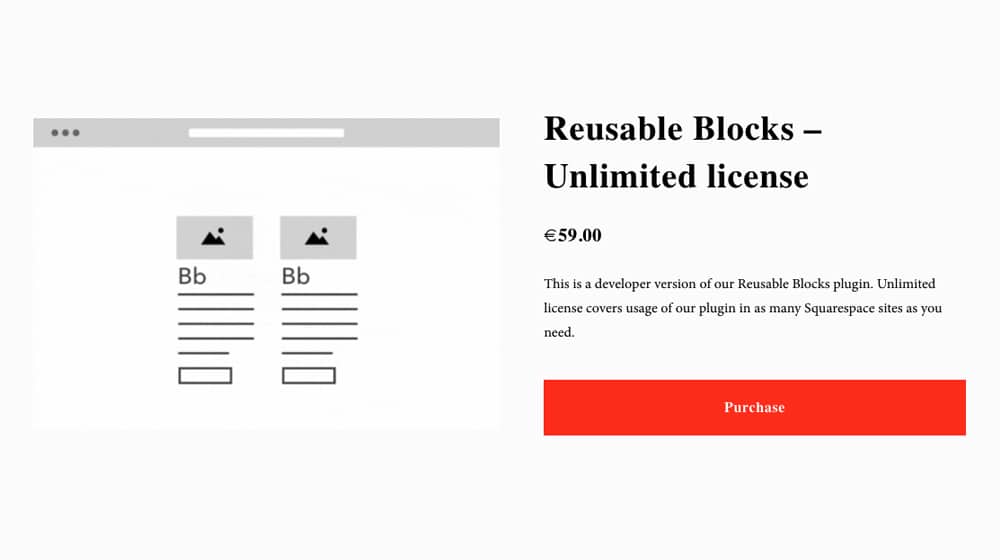
Compared to WordPress, which is unrestricted, this is a bummer. I haven't seen another way to save a block of content on Squarespace, though. Let me know in the comments if you know of one!
Shopify, likewise, doesn't seem to have a plugin at all, and you'll have to add your disclaimer every time manually. If you're considering a platform switch, you might want to look into migrating your Shopify site to WooCommerce. They have plugins for adding ToS agreements and things to your checkout process, but that's not quite the same thing. There are also apps available to improve the default Shopify blog experience if you'd rather stay on the platform.
In general, the easiest way is, unfortunately, the tedious way. Generate your disclaimer, save it as a local file, and paste the content in every post you write.
Expanded Disclaimers
Sometimes you want more nuance or more information to your disclaimer. You don't want half a dozen paragraphs on your posts, but you can't make one disclaimer page for your footer; it's not considered good enough. So what do you do?
First, create your reusable block disclaimer with a simple 1-2 sentences like my example above.

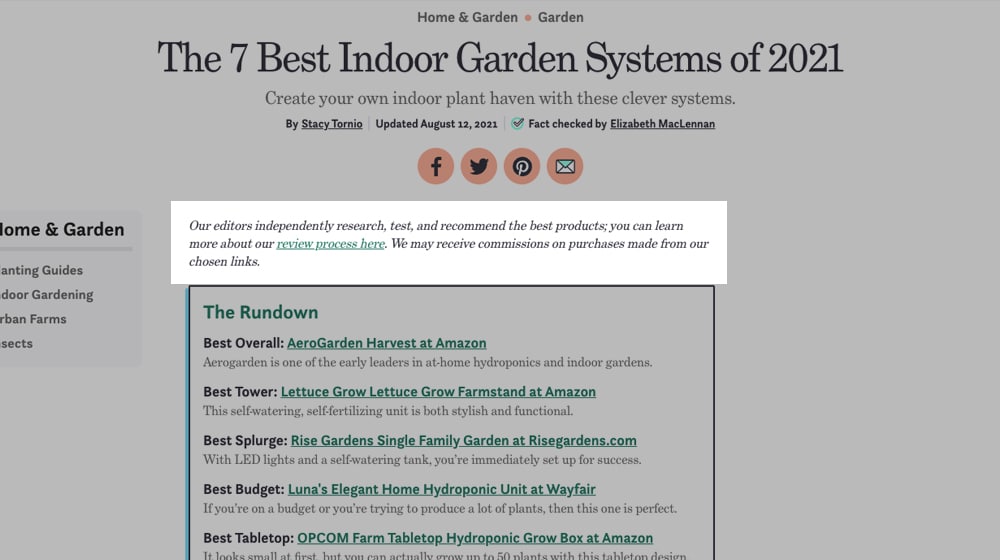
Then, link that disclaimer to a page that has more information. Making Sense of Cents does this as a good example.
- A short text disclaimer is a quick text disclaimer at the top of each blog post, below the title but above the social sharing buttons. It links to:
- This page, which is their full disclosure, gives interested readers more information (and a trust signal) so they can understand the full extent of the site's use of Amazon affiliate links.
It's easy enough to set up a Page, link it in your footer, and link it in your reusable block.
Claiming Disclaimers
Adding a disclaimer to every post on your site is relatively easy, at least in WordPress, and setting it up so that text is inserted automatically isn't too hard either.
If you're concerned about duplicate content issues, don't be. For one thing, Google knows and understands disclaimers and knows they need to be there, and they won't penalize you for them. For another, it's one or two sentences out of an entire blog post, which is nothing. And, for three, it'd be better to have a Google penalty than an FTC/FDA lawsuit, so either way, add your disclaimer. There's no excuse not to.
Written by James Parsons
Hi, I'm James Parsons! I founded Content Powered, a content marketing agency where I partner with businesses to help them grow through strategic content. With nearly twenty years of SEO and content marketing experience, I've had the joy of helping companies connect with their audiences in meaningful ways. I started my journey by building and growing several successful eCommerce companies solely through content marketing, and I love to share what I've learned along the way. You'll find my thoughts and insights in publications like Search Engine Watch, Search Engine Journal, Forbes, Entrepreneur, and Inc, among others. I've been fortunate to work with wonderful clients ranging from growing businesses to Fortune 500 companies like eBay and Expedia, and helping them shape their content strategies. My focus is on creating optimized content that resonates and converts. I'd love to connect – the best way to contact me is by scheduling a call or by email.


April 04, 2022
Oh, I didn't know it was possible to automate this. Thanks, you've made this easier for me.
April 29, 2022
Thanks Brett!
We use this all the time for our legal clients, or clients that have affiliate links. It makes life a lot easier 🙂