How to Add a "Pin It" Button to Images in WordPress
Written by ![]()

The world of social media is in turmoil these days. Twitter imploding is a big part of it, and while platforms like Mastodon, Bluesky, Cohost, and Threads have tried to take up its market share, none of them has come out on top just yet. Meanwhile, Facebook is slowly losing its audience simply by being too big and unable to please everyone.
One social network that hasn't imploded, though, is Pinterest. Though they've had plenty of scandals over the years, from SEO bombing and spam to people demanding ways to remove Pinterest from their search results entirely, they've still managed to hang on, a second-tier social network with plenty of audience and reach.
Part of the reason why Pinterest hangs around is because they don't really require a lot of effort to utilize as a marketer. You can share your own content on Pinterest with relative ease, but more than that, you can get other people to do it for you just by making it easy to "pin" the images in your content to Pinterest, thus saving both the image and the content attached to it.
As a site owner, even if you're not keen on using Pinterest yourself, you can still encourage your users to make use of it. One of the main ways to do that is to add a "pin it" or "pin this content" button to your site and your images. The only questions are why and how.
This tutorial will help you add a custom button to your site and walk you through each of the steps in your WordPress dashboard! I'll also show you how to use a custom image.
Key Takeaways
- You can add a Pinterest "Pin It" button via Pinterest's official script or by using third-party WordPress plugins.
- The Weblizar plugin and Social Warfare are recommended options, with Social Warfare prioritizing site speed performance.
- Custom button images and CSS can be uploaded through plugin settings to better match your site's branding.
- Pinterest works especially well for niches like DIY, cooking, decorating, and crafting, driving passive traffic effectively.
- Pinterest's official "Pin It" button has been officially called the "Save" button since 2016, though the old name persists.
While there are a bunch of third-party ways to add a Pin It button to a WordPress site, sometimes the best option is the official option. In this case, you can follow Pinterest's documentation directly to add the button, specify details about the pins it creates, and make sure the experience of pinning your site to a Pinterest board is smooth and seamless.
Unfortunately, this process is a little complicated, so you'll have to go through it step by step.
The first thing you need to do is add Pinterest's official site-wide code to your site. Unfortunately, WordPress doesn't make it very easy to do this. There are a few options to do this, from editing your theme's files directly or using a plugin:
To edit your theme directly, you could create a child theme copying your existing theme. This ensures that if anything you do breaks the theme, you can revert to the parent theme without losing anything. From there, find the relevant file for a footer or body for your template, and add the code I'll paste later on. I don't generally recommend this option, both because it's more error-prone and because your changes will be lost every time your theme updates.
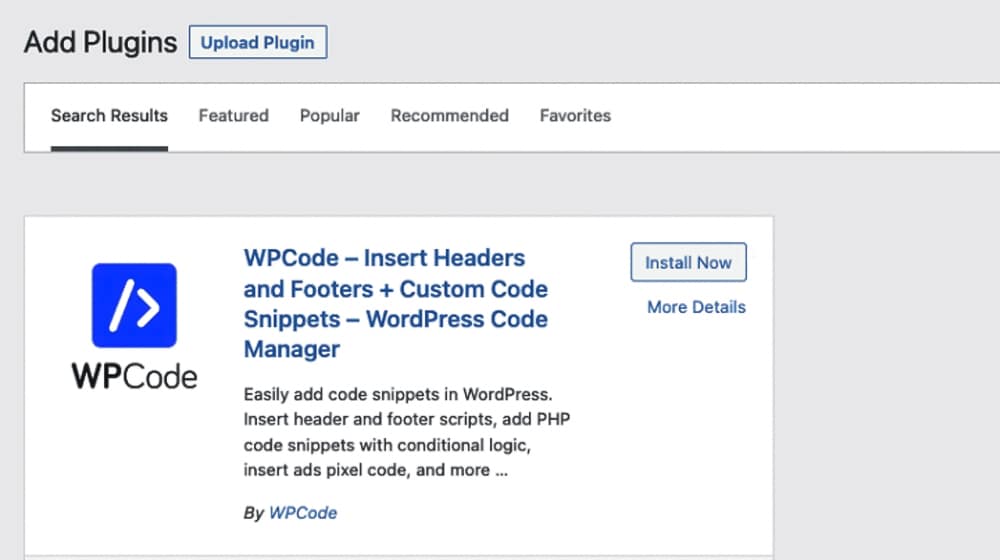
Or, you can use a free plugin like Insert Headers and Footers, which makes it very easy to manage any JavaScript that you want to add to your site. There is also WPCode, which is very similar; this adds the ability to add custom code to any part of your site, and since it's attached to a plugin rather than your theme, theme updates won't break it.
The Pin It script is Pinterest's generic tracking script that contains all of the functions necessary to make their various buttons and widgets work. The code you paste in is this:
<br>
&amp;lt;script type=&amp;quot;text/javascript&amp;quot;&amp;gt; (function (d) { var f = d.getElementsByTagName(&#039;SCRIPT&#039;)[0], p = d.createElement(&#039;SCRIPT&#039;); p.type = &#039;text/javascript&#039;; p.async = true; p.src = &#039;//assets.pinterest.com/js/pinit.js&#039;; f.parentNode.insertBefore(p, f); })(document); &amp;lt;/script&amp;gt;<br>
That's it! Without this code, your buttons won't work; with it, they do.
Pinterest recommends keeping this code to the end of the <body> section of your site, and they caution not to put it in a site-wide footer because then it'll apply to pages you might not want it on. I say, go right ahead; you can manually remove it from specific pages, set attributes on images you don't want to be shared, and otherwise, you can denylist your system pages more easily than applying it manually to every allowlisted page.
The biggest caution here is to avoid adding this script more than once on any given page. Sometimes, adding it to multiple places or moving it but not removing it from an older location can cause duplications. That'll cause problems when people try to use your buttons later.
The second step is to add the code that actually calls the Pinterest Save Button code and activates it.
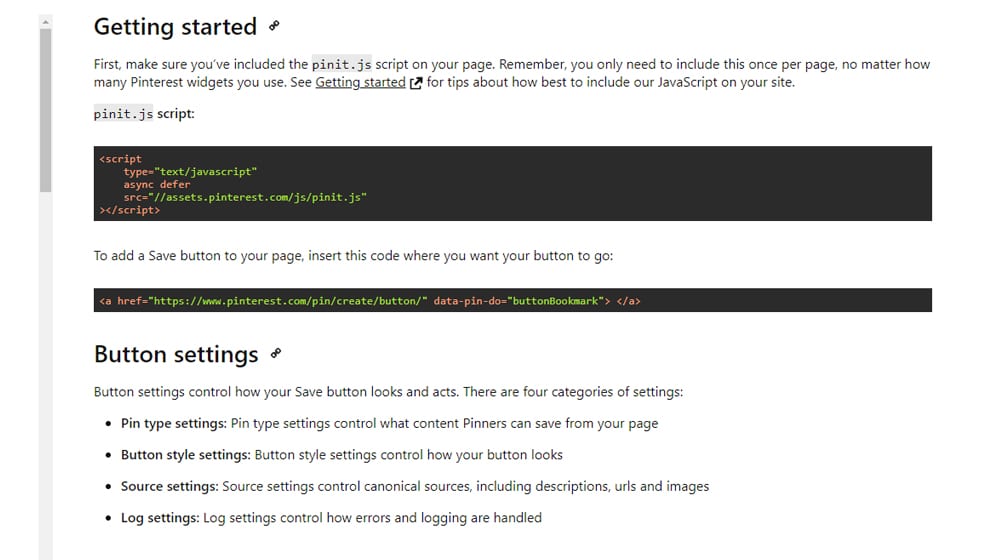
That code is pretty simple, too:
<br> &amp;lt;a href=&amp;lt;span class=&amp;quot;hljs-string&amp;quot;&amp;gt;&amp;quot;https://www.pinterest.com/pin/create/button/&amp;quot; data-pin-&amp;lt;span class=&amp;quot;hljs-keyword&amp;quot;&amp;gt;do=&amp;lt;span class=&amp;quot;hljs-string&amp;quot;&amp;gt;&amp;quot;buttonBookmark&amp;quot;&amp;gt; &amp;lt;/a&amp;gt;<br>
You can add this code surrounding any image you insert into a post in WordPress. I recommend either creating a custom shortcode or creating a unique block that includes both that code and the image; however you prefer to handle it.
The key here is to make sure you're setting the right attributes.
- Data-pin-do. This is the attribute that lets you decide whether your button is only on the specific image or all images on the page.
- Data-pin-ID. This is an ID number for the pin URL. This is either created the first time the image is pinned or references the ID from that time, so you don't end up with a bunch of different pins of the same image and post.
There are a bunch of other IDs you can set as well. It's all a little complex, and it lets you specify what kind of pin button you want to use. Here's the documentation.
Now, normally, I'm the kind of guy who loves fiddling with code to get everything working just the way I want it to work. But I'll admit, Pinterest really doesn't play nice with WordPress the way you would want it to work. Frankly, it's better to use a plugin to jump through all of these hoops for you.
Fortunately, there are a bunch of different options available to you to handle Pinterest integration on your site.
Once you've installed the plugin, you'll have access and control over how you want Pinterest buttons to appear on your site, including allowing image hover buttons. You can also customize how the button shows up, which can be nice to make it more closely adhere to your brand appearance guidelines.
This plugin also has a pro version that costs $18 and gives you access to the various Pinterest widgets as well. If you want to embed a pin feed on your account's boards, this is an easy way to do it. You can also add elements to shortcodes or custom blocks to manage them in the context of an individual page as well.
Configuring the plugin is pretty easy. First, choose the top-level options, like whether or not you want a pin button on your site and if you want image hover buttons. Then, you can go to the Exclude Images and Exclude Pages sections and pick specific images or pages to remove from the list. Since it's usually easier to add a few system page exceptions than it is to manually include every normal blog post, this is pretty easy.
Social Warfare has long been my favorite of the social media mega-plugins. It covers pretty much all of the bases with the most important social networks. For Pinterest specifically, it gives you the hover button options, with one additional feature: you can have it preconfigure the pin that generates rather than leaving it up to the user. It's a lot like a "click to tweet" kind of plugin that lets people share your message rather than just your link with their message.
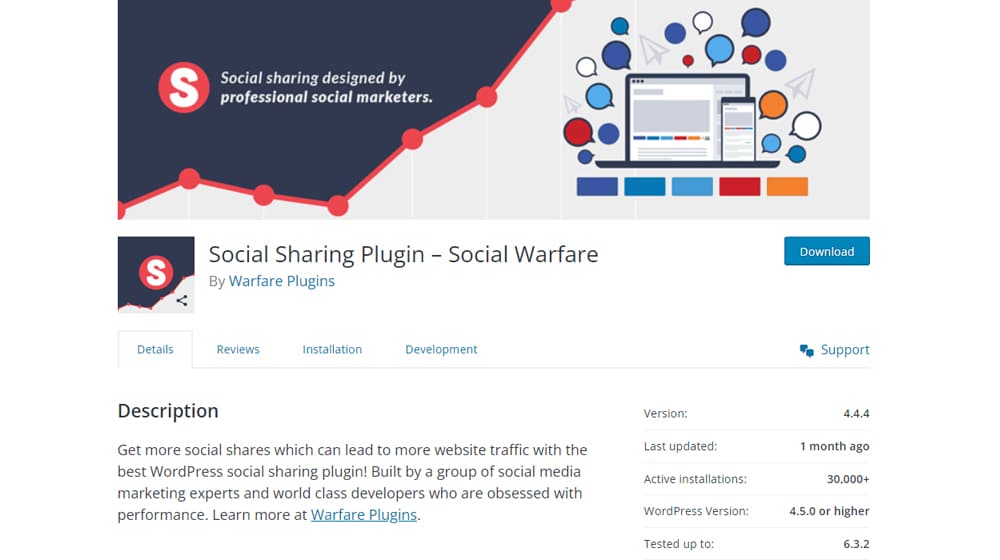
I'm also a stickler for plugins that work well and don't slow my site down. One of the greatest hassles with social media sharing plugins is slowing down loading times due to loading all the various scripts. Social Warfare focuses on site speed above just about everything else, so you aren't going to see a significant speed drop compared to not having the buttons at all.
The best part is, while Social Warfare isn't free, it's pretty cheap; it's $29 for a single-site license, and if you're an agency or otherwise work with a lot of sites, they have multi-site licenses and even an unlimited license available. I recommend checking it out. If you're also running paid social campaigns, it's worth asking yourself whether you're wasting money on TikTok ads before expanding your social media budget further.
Other Plugins
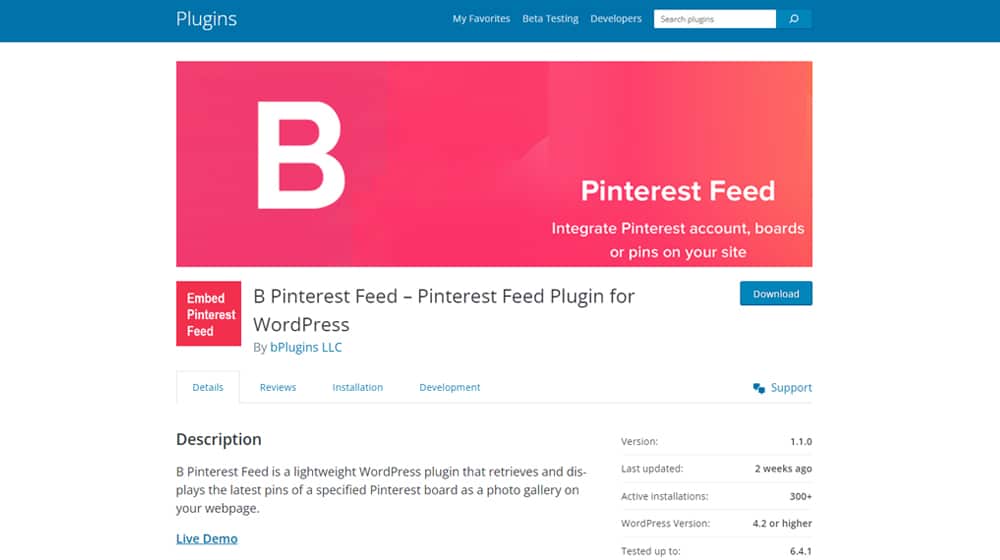
If neither of these plugins does it for you, there are plenty of other options available. They all basically do the same thing with Pinterest integration because they're all just alternate ways of implementing Pinterest's code on your site. Options include B Pinterest Feed, AddToAny, and BestWebSoft's Pinterest Plugin.
Basically, feel free to visit the WordPress plugin directory and browse. There's certainly going to be something that does what you want it to do. There's not all that much nuance to Pinterest in the first place, so unless you plan to be using multiple kinds of buttons and widgets alongside Pinterest ads, you don't really need a particularly advanced solution.
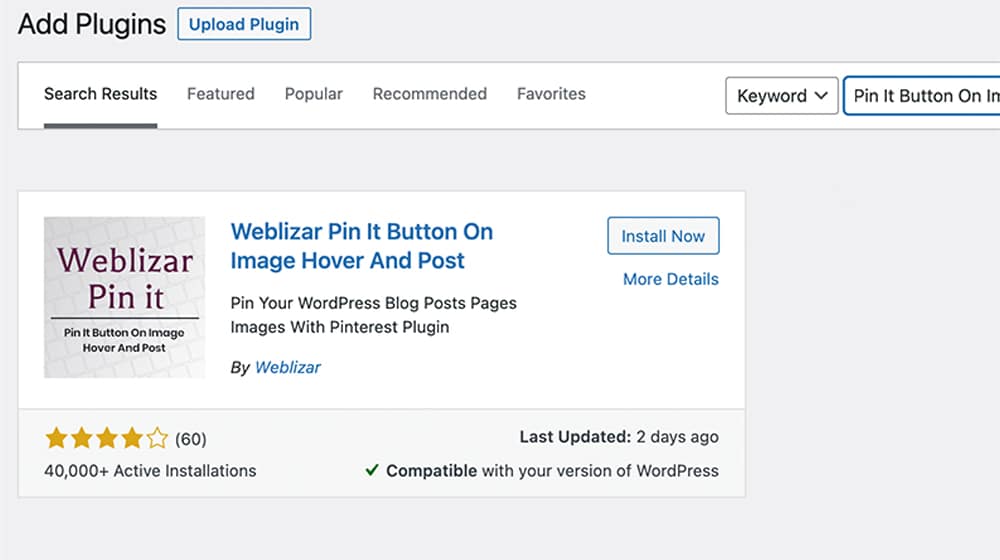
After installing your pinterest buttons, you miht not like the look of them. The Weblizar plugin, for example, isn't the most attractive plugin and it adds tiny little buttons. It's kind of hard to see those buttons, isn't it?
So what can you do?
First, find a "Pin it" button that you like. I made my own; you're welcome to use it if you'd like. It's nice and large and easier for users to see:

Then, navigate to your plugin settings. For the Weblizar plugin, you would go to:
- Settings
- jQuery Pin It Button For Images Lite
- Visual
- Scroll down to the "Pin image" section
Then, click "Upload an image using media library". Here, you can upload your new image. Set the height and width of the image, and then save the settings!
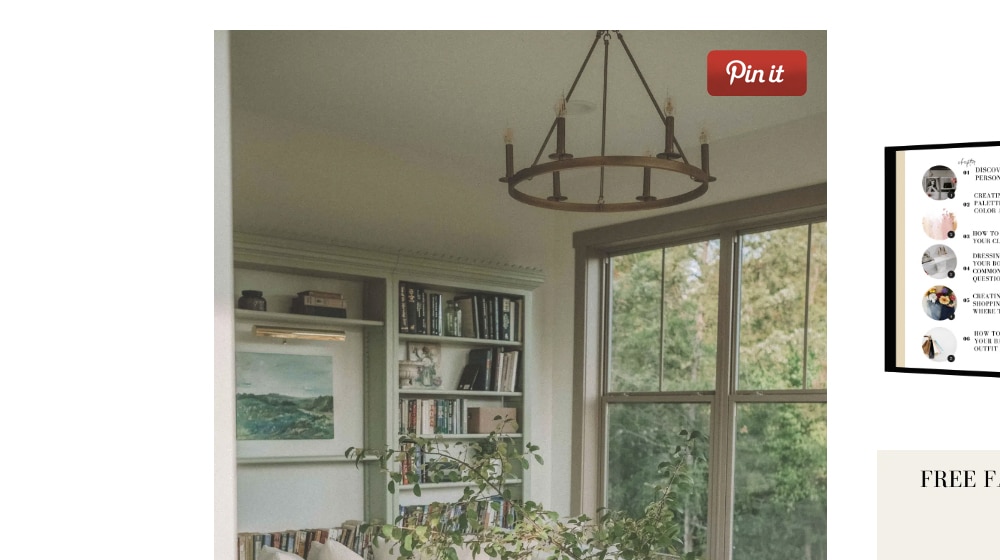
That's a much more attractive button now, isn't it?
Add a "Simple CSS" plugin (there are many on the WordPress.org plugin repository), or visit the "Additional CSS" section of your theme. Or, some plugins (like the Weblizar plugin we're using for this example) have it built right into the plugin under the "Advanced" tab.
Then, add your custom CSS code. For example, you might want to change the button's border or background color. You can also use our Paragraph Length Checker to make sure your content is properly structured before publishing.
Here's a basic CSS snippet:
<br>
a.pinit-button {<br>
border-bottom: 0 !important;<br>
box-shadow: none !important;<br>
margin-bottom: 0 !important;<br>
}<br>
a.pinit-button::after {<br>
display: none;<br>
}<br>
Once you've saved your CSS code, save your changes and preview your site to see the new button in action.
You can also explore more advanced CSS customizations like hover effects, colors, drop shadows, and more. If you're new to CSS, you can check out this great introduction guide by W3 Schools here.
If a lot of people hate Pinterest results, they've had a history of scraping for SEO purposes, and social media as a whole is getting harder, why is Pinterest still a good site to use?
In my experience, Pinterest can be a surprisingly good driver of traffic, particularly in certain niches. It's image-heavy but not image-centric the same way Instagram is, so those visuals do a lot to draw people into your blog's graphical style. Moreover, it's extremely popular amongst certain audiences. DIY, decorating, cooking, crafting, and other kinds of niches get a lot of interest from Pinterest.
One of the most important factors on Pinterest is aesthetics. People build entire pin boards just for the aesthetics, moods, vibes, and general oomph of the images they pin. When they find a site with an aesthetic they like, they'll dig in and find as many examples as they can to populate their boards. Creating great blog images goes a long way toward making your content more pinnable.
Other people use Pinterest as a more standard kind of social network. While there's less person-to-person socialization on Pinterest compared to things like Facebook or Instagram, it's still very popular and a great way to hook people.

Plus, Pinterest doesn't get in the way of other social sharing options. For example, when you have a box on the side of your screen or at the bottom of a post with half a dozen social sharing buttons, which one is the user going to click? You can never be sure. But, by using a hover button over your images, you're limiting them to one option: if they want to share, they share on Pinterest.
Another detail is that the "people don't want Pinterest results in their search results" thing is quite telling. While some vocal folks don't like Pinterest results, most people don't mind them, and the very fact that they're so prevalent means that they're always up there in the top results.
Of course, Pinterest can also be very passive for a marketer. You don't need to do a whole lot beyond adding the buttons. You can, if you want, go through to customize all of the various pins for your posts, and I recommend you do so, but start with your best evergreen posts and work your way down. The 80/20 rule is in force here.
Pinterest can be a very good way to get a bunch of extra traffic passively, but in order to get that traffic, you need content to end it. That's where I come in. I've been in content marketing for a decade, and while the industry has changed a lot in that time, it's only grown more and more important to do it right. If you want a top-tier blog, reach out, and let's chat!
Written by James Parsons
Hi, I'm James Parsons! I founded Content Powered, a content marketing agency where I partner with businesses to help them grow through strategic content. With nearly twenty years of SEO and content marketing experience, I've had the joy of helping companies connect with their audiences in meaningful ways. I started my journey by building and growing several successful eCommerce companies solely through content marketing, and I love to share what I've learned along the way. You'll find my thoughts and insights in publications like Search Engine Watch, Search Engine Journal, Forbes, Entrepreneur, and Inc, among others. I've been fortunate to work with wonderful clients ranging from growing businesses to Fortune 500 companies like eBay and Expedia, and helping them shape their content strategies. My focus is on creating optimized content that resonates and converts. I'd love to connect – the best way to contact me is by scheduling a call or by email.


Comments