
How to Improve the Speed of a Drag and Drop WordPress Site

![]()
Website load times and site speed are incredibly important metrics that are invisible until they go bad. Google has been pushing website owners to pay attention to them, from their PageSpeed Insights tool to their inclusion in the Core Web Vitals metrics.
I've written before about how a WordPress site can be slow, and what you can do about it. The thing is, not everyone has a site where this advice works.
Drag-and-drop website editors that create WordPress sites can be very convenient, but they aren't always well designed. They use discrete code modules for individual features, like navigation elements, image lightboxes, slide-in boxes, and other page elements. The trouble is, while each one of those modules may be fine in isolation, they're only designed to look good together, not work well together on the back end. They tend to have a lot of redundant code because the site builder can't rely on their users using individual elements together.
What this means is that a lot of your standard tricks for improving the speed of a WordPress site don't work. What kind of tricks?
- Lazy loading images and scripts.
- Deferring loading of off-screen images.
- Minifying scripts, CSS, and code.
Since you're not able to dig into the code the page builder is using, you can't make edits to them, and plugins don't work with them. It's a huge pain when you're trying to speed up a site that you could usually just optimize by, say, slapping on WP Rocket and calling it a day.
These tips apply to the following drag-and-drop website builders (and others):
- SeedProd
- Beaver Builder
- Divi
- Elementor
- Visual Composer
There are a few ways you can work to optimize these kinds of pages, but they aren't your usual speed optimizations. Here's what I've come up with through tinkering on them myself.
 30 Second Summary
 30 Second Summary
Website load times matter a lot. Sometimes, optimizing a WordPress site using standard tricks such as lazy loading images, defer loading off-screen images or minifying scripts might not work, especially with site builders like SeedProd, Beaver Builder, Divi, Elementor and Visual Composer. Consider loading CSS Inline, manually optimize images before uploading and use a next-gen image format like WEBP. Minimize use of large backgrounds and animations and also pay special attention to mobile performance. Server-side speed assistance can also help boost load times.
Load CSS Inline
Loading CSS from an external source takes time, even if the source is local and the CSS is small. It's faster for an initial load – which Google cares a lot about, using their first contentful paint metrics – so a minor change can have a slightly less than minor benefit to your site.
One easy way to do this is to edit your WordPress PHP files directly. Now, this might require a little bit of knowledge of how coding and PHP works, but it's pretty easy. You have two choices here; you can edit your header.php file directly, or you can edit your functions.php file to include a function editing your header. Editing the header directly is more dangerous because you can accidentally break something and need to replace it with a backup or fresh version from your theme. The functions.php file is meant to be a sort of sandbox you can use to keep your custom code isolated from the system files.
Either way, the code you want to add looks something like this:
<style>
<?php echo file_get_contents( "https://contentpowered-bc85.kxcdn.com/home/public_html/yoursite/wp-content/themes/themename/style.css" );?>
</style>
If you want to use the functions.php version, you can follow the instruction on this page for using a functions.php script. Make sure you edit the file path and file name as necessary to customize the code as well. Change "yoursite" and "themename" (and possibly the style.css filename) to match your theme's CSS file.
This script executes when a user loads your page and pulls your CSS in faster than using an external file. It won't be a huge impact unless you're doing a ton with your CSS, like animations, but it should be at least a small benefit to your core web vitals. That is, once they update, which can take a while.
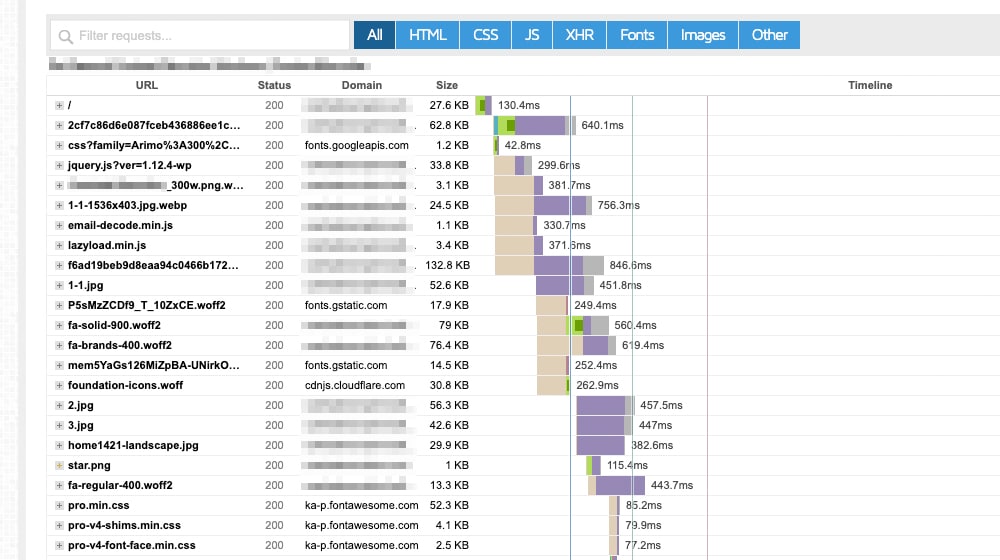
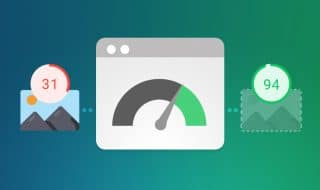
Manually Optimize Images
Images are usually second only to video and unoptimized scripts in terms of how much they can delay the loading of a website. That's why there are so many plugins out there to automatically smush or compress images when you upload them to your WordPress page. Unfortunately, with a drag-and-drop web builder, you can't use those plugins.
There are other ways you can optimize your images, but they'll involve adding a new process to your content workflow. Specifically, you'll need to use some kind of tool to optimize your images before uploading them. Here are a few options.
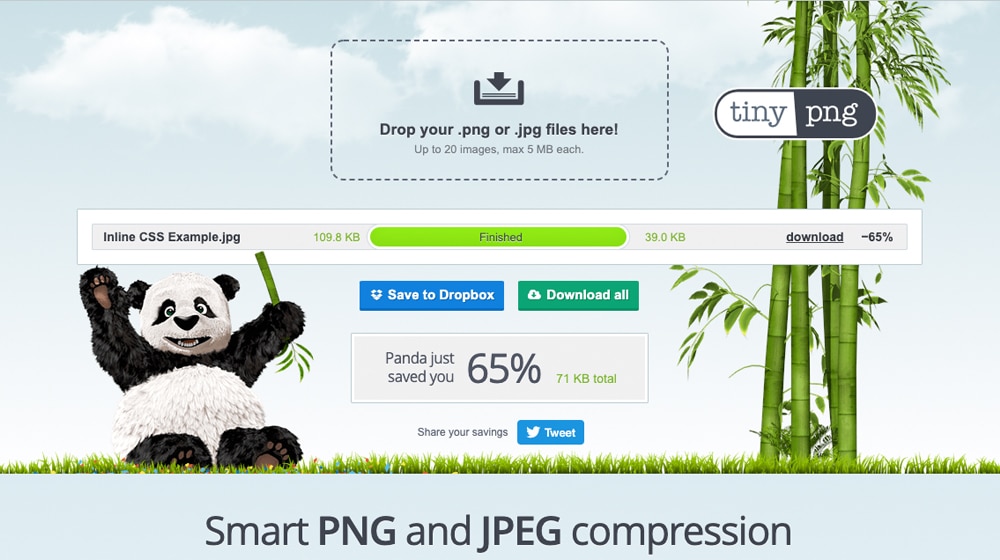
Option 1: Use a tool. There are a bunch of web-based tools out there you can use to optimize your images. You upload them to a tool, it does the optimization work with its software and feeds you the optimized image that is ready to download and use on your website. You can try some of these:
- TinyPNG. This tool handles PNGs and JPGs and compresses them by evening out colors in an imperceptible way. It can even handle animated PNGs if you use them. It's free for files up to 5MB in size, which is a bit limiting if you use large photos or vectors as source files. It costs $25 a year to bump that limit way up and give you a better interface for optimizing images in bulk.
- Optimizilla. This tool is pretty similar to the above. You can drop in up to 20 images at a time, in PNG or JPG format. It's a lighter page and gives you a before/after comparison and the ability to adjust your desired level of optimization, both of which are pretty useful.
- Compressor. A slightly more robust image compressor, this tool works with PNGs, JPGs, SVGs, GIFs, and WEBPs. You can set varying levels of compression, choosing lossy or lossless, and it handles files up to 10MB.
These are some great options, but only if you have an active internet connection and are willing to upload your images. If your images are too large, in an unsupported file type, or are private enough you don't want to upload them, you may want to do some manual optimization.
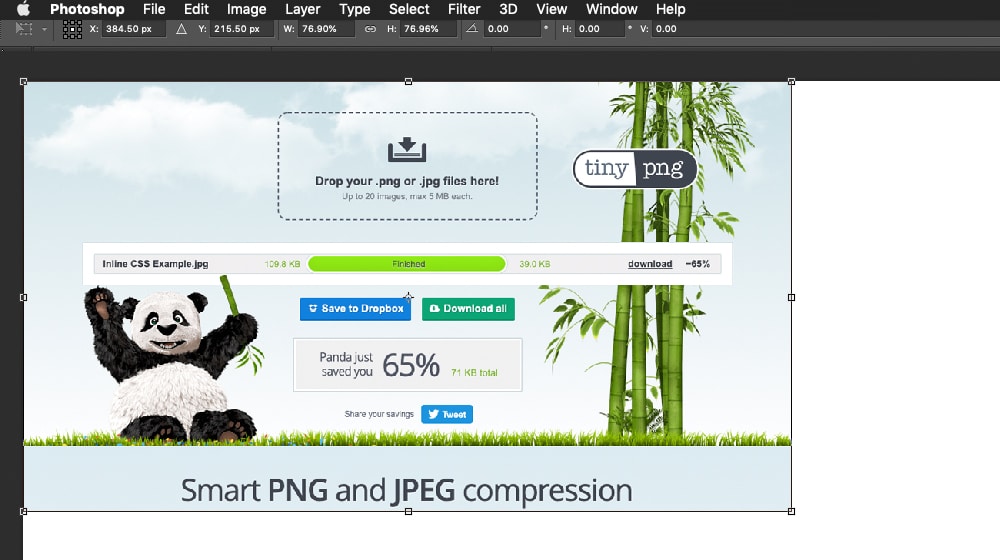
Option 2: Manual optimization. Picking up a tool like Photoshop allows you to do a ton with images natively on your computer. It's a little overkill to get a high-end art program just for some image compression, but if you can't do it any other way, it works.
There are a handful of tweaks you can make.
- Change the file type to one with greater compression algorithms, typically PNG or JPG.
- Reduce the dimensions of the image to a more usable and smaller size.
- Reduce the number of colors in the image. Images with millions of colors and images with thousands of colors look identical but save a lot of space.
You can read deeper into this on WPBeginner here.
We create blog content that converts - not just for ourselves, but for our clients, too.
We pick blog topics like hedge funds pick stocks. Then, we create articles that are 10x better to earn the top spot.
Content marketing has two ingredients - content and marketing. We've earned our black belts in both.
Use a Next-Gen Image Format
Do you know how long we've been using the same old suite of PNG, GIF, JPG, and so on? JPG was invented in 1992. GIF was invented in 1987. PNG was invented in 1996. I'd say that 20-30 years is a long enough time for an image format to get outdated and need replacing, wouldn't you?
WEBP is the new image file type being pushed by Google. They invented it in 2010, and it's very slowly gaining some more traction as browsers and software start recognizing it. It's taken a while to get to this point, but it's an option.
WEBP is essentially a new file type with a new compression algorithm that allows it to store more data in a smaller package. It can be up to 26% smaller than the same image in the same quality as a PNG. It sounds petty good, right?

The primary downside to WEBP is that it's not fully supported. Safari and Internet Explorer don't recognize the image format, though Chrome, Firefox, Opera, and Edge all do. More and more support is being added every year, but if you have users on old browsers, you may need to do some tricky code work to make your site serve a backup PNG to anyone who can't render WEBPs.
Much like compressing images, you can make WEBP images manually using Photoshop, or you can use an online tool like this one to convert a file to a WEBP file. From there, you can generally just treat it like any other image file on your site - upload it, add metadata, and use it in a post.
Drop Backgrounds and Animations
One thing a lot of novice web designers like to do is create a website using one of two things; a large, complex background, or an animation.
Backgrounds aren't necessarily bad. If you use a simple tiled effect, a gradient, or even just a simple image, they're fine. The trouble is, a lot of people decide to create a huge image that loads in the background. That slows everything down, and frankly, most people are going to ignore it anyway.
If you insist on using a background, make sure to compress the image as much as possible so it loads quickly. Otherwise, something like specifying a color in your code will work much better and won't slow down your site at all.
Animations are a bane as well. Sure, a website can do some very clever and very cool stuff using CSS3 and HTML5 animations, but are you doing that? Chances are if you're reading about optimizing a drag-and-drop web builder, your site doesn't have these less-common technologies. You're more likely to be using embedded videos, image slides or galleries, or GIFs with large file sizes. Even something relatively simple, like adding a snowfall script to your website, can slow it down and make usability a nightmare.
I highly recommend disabling animations and replacing animated images if possible. They don't add that much to a modern web page, and if you want them later, you can use them the right way. Until then, leave them to the people who can implement them in a low-size and fast-loading way.
Don't Forget Mobile
Remember that the mobile internet and the desktop internet are different, these days. Oh, the same content can be accessed on them both, but the way they look and feel varies dramatically. A mobile site design looks a lot different from a traditional site design.
Google cares a lot about mobile site speed, so much so that their mobile-first update made it a priority. Mistake #1 I see a lot on mobile sites is keeping large, above-the-fold images from their desktop sites in their mobile design.
This slows down your site and hurts your PageSpeed metrics. The large image has to load to display the first paint of content on your site, and that takes ages, especially on slower mobile connections. It also hurts your site usability, since the user has to wait for the image to load before they can start interacting with your site (another Core Web Vital, time to first interaction), and it fully loading can push content around mid-tap.
Consider optimizing your mobile site to remove such large media. It's difficult to appreciate on a mobile site as it is, so you should leave it as part of the desktop experience.
Use Server-Side Speed Assistance
There are two ways you can use server-side apps to help speed up your site.
The first is to use an app like Varnish. This is a server-side caching app that essentially renders and caches your website for delivery at the speed of the network. No waiting on servers to do things, no waiting on HTTP call-and-response cycles, none of that. It's a very powerful app, but it can be intimidating to implement. Blame the Linux guys for that, none of them think much about user experience.

The second option is to use something like Cloudflare. Cloudflare's CDN service essentially removes your own web server from the equation. They mirror your site on their content delivery network, so it's always available at a high speed from a data center local to your users. Different users get the same data from different sources, though all of it comes from your site originally. It doesn't change anything like your URL and can't get you into duplicate content issues, it's just a performance, speed, and security program.
Wrapping Up
To be honest, 90% of the battle for site speed comes down to images and CSS. Keeping CSS in a separate file is always a little slow, but really, it's the images you should worry about. Removing unnecessary huge images like backgrounds, compressing the images you do use, and offloading their loading to a CDN can do wonders for your site speed.
James Parsons is the founder and CEO of Content Powered, a premier content marketing agency that leverages nearly two decades of his experience in content marketing to drive business growth. Renowned for founding and scaling multi-million dollar eCommerce businesses through strategic content marketing, James has become a trusted voice in the industry, sharing his insights in Search Engine Watch, Search Engine Journal, Forbes, Entrepreneur, Inc, and other leading publications. His background encompasses key roles across various agencies, contributing to the content strategies of major brands like eBay and Expedia. James's expertise spans SEO, conversion rate optimization, and effective content strategies, making him a pivotal figure in the industry.

January 05, 2021 at 10:52 am
I felt like I still need to do something to improve the page speed. Do you recommend any app to check my site so I would know what seems to be the prob?
January 08, 2021 at 9:28 pm
Hey Catherine,
The problem is there's always something that can improve your speed! Trust me, I've obsessed over it enough.
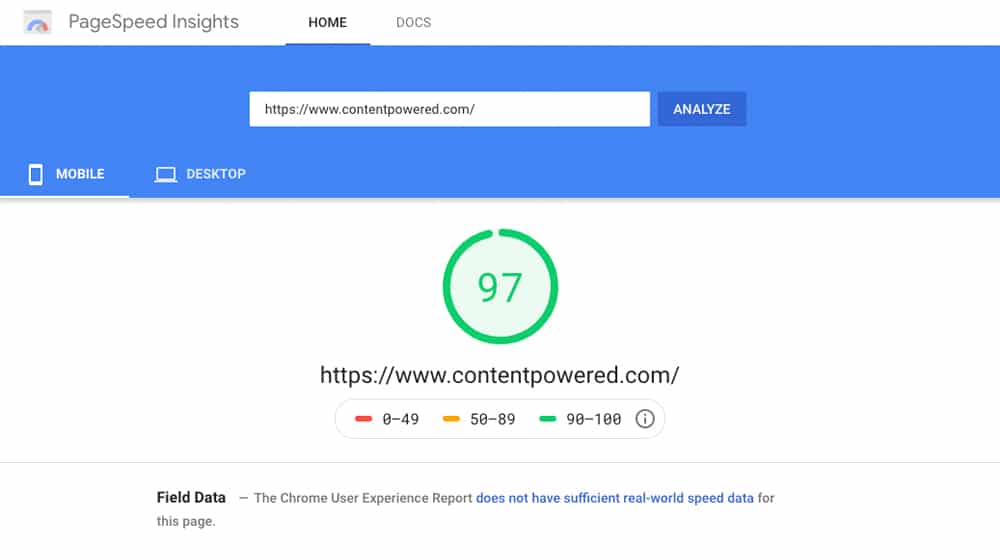
You start to lose your mind once you get into the 95+ score on Google PageSpeed. Reaching 100 is basically impossible.
Google PageSpeed will report the metrics that you should focus on.
They will tell you specifically what you can do to improve your speed, and which code on your site is responsible.
As long as your site is in the "Good" category, which is 90 or higher for both desktop and mobile, you are in great shape.
March 23, 2022 at 6:09 pm
Ahh... Looks like we have some work to do with our images. I'll check out the optimization tools you've mentioned.
March 25, 2022 at 1:51 pm
Hey Rick! I'm happy to help.
Most drag and drop site builders are a little clunky with images.
They can usually be cleaned up with some custom CSS to prevent layout shift and improve mobile performance.