How to Create a Blog Post Outline (With Free Templates)
Written by ![]()
Newcomers to blogging and experienced bloggers alike have one thing in common: the ever-present need to organize our thoughts. Writing blog posts takes more than just a stream of consciousness putting words to the page.
The key to a good blog post is the same as it was back in high school composition classes: the outline. Writing a solid outline for your post will make it infinitely easier to organize your thoughts in a logical manner, figure out what sections are important and which aren't, and meet your word count goals without over-fluffing particular sections.
Different people develop their own processes for blogging, but virtually every talented writer starts their article an outline.
Let's start by digging into why outlines are considered a best practice for article writing.
Key Takeaways
- Outlines help writers remember key points, maintain logical flow, and make writing longer posts significantly easier.
- Before outlining, research competing posts to identify structure gaps, missed opportunities, and supporting data sources.
- Each blog post section should average 100-300 words; oversized sections should be split using additional subheadings.
- Free downloadable templates exist for short posts, long posts, news articles, and how-to guides in multiple formats.
- Templates risk removing your unique voice; the more template structure remaining in the final post, the less effective it becomes.
Free Blog Outline Templates (Downloads)
Templates can save you a ton of time when you're writing a new article. It's not going to write your post for you, but it'll at least give you a loose structure.
Here's a few different templates for your consideration, in both PDF and Doc/Docx format:
- Short Blog Post Outline (300-500 words)
- Download .docx (Microsoft Word 2007 or later, newer systems)
- Download .doc (Older systems and for maximum compatibility)
- Download .txt
- Long Blog Post Outline (1500+ words)
- Download .docx (Microsoft Word 2007 or later, newer systems)
- Download .doc (Older systems and for maximum compatibility)
- Download .txt
- News Blog Post Outline
- Download .docx (Microsoft Word 2007 or later, newer systems)
- Download .doc (Older systems and for maximum compatibility)
- Download .txt
- How-To Blog Post Outline
- Download .docx (Microsoft Word 2007 or later, newer systems)
- Download .doc (Older systems and for maximum compatibility)
- Download .txt
- The intro is the top bun.
- Then you have some preamble, context and filler which is the condiments.
- Then you have the meat, which is the most important part of the post.
- At the end is the bottom bun, which is the conclusion.
- How are their posts structured? Is it an effective structure, or can you optimize it?
- What points are they making? Are you making similar points or different points, and do you have anything new to add to the conversation? For example, there are a lot of other "how to write a blog post outline" posts out there, but I use a different process than they do.
- Are they including data or sources you didn't find? By supplementing your own sources with sources you find through your competition, you can out-do their posts with your own.
- Do they mention anything that throws a wrench into the works for your posts? Occasionally I've come up with a topic idea and, upon researching it, found clear counter-evidence that makes my post just flat wrong. I have to either drop the topic or retool the post.
- Did they miss any opportunities? The best way to compete is to strive to do better than the competition. Right? Looking at competing blog posts can be helpful to spot cracks in their article. If their article left you with unanswered questions, or if their list is smaller or more disorganized than it should have been, that's a great opportunity to build a better version of that resources.
- Make sure your ____________ lets you _______________. If it doesn't, you'll have trouble ___________.
- Ensure your ___________ has a ____________ so you can ____________.
- Any good ______________ should let you _____________. This is important because _________________.
You can think of a blog post like a sandwich:
You'll find most posts, whether it's a niche industry, academic, professional, or casual - follow this same loose format. Learning more about how to structure a blog post can help you make the most of these templates.
Templates might also help you with writer's block. If you find yourself getting stuck on what to cover next, the template might keep the post moving along towards it's eventual conclusion. That can help you keep posts from sounding disjointed or off-pace. You might also find our word counter useful for tracking your progress as you write.
Please let me know what you think, and if there are any other types of outlines you'd like me to upload!
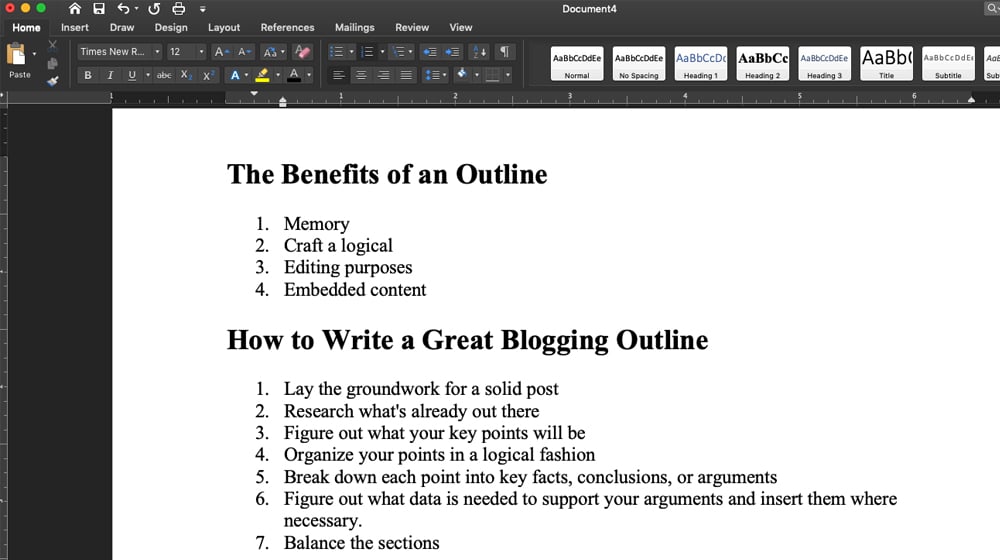
The Benefits of an Outline
If you're not convinced you should use an outline, or you're not sure what the point is, here are the benefits I've noticed while writing them.
1. First and foremost, you get benefits to memory. I don't know about you, but I have a common problem where I'll think up some ideas for sub-topics or points I want to make in a blog post, but then while writing the post, I'll forget to add them. By writing an outline, I can include those points in roughly the place in the post they would be, and make sure they're covered. It helps ensure that my content is dense with information and more valuable overall.
2. Secondly, it allows you to craft a logical flow from point A to B to C. You might know what your introduction is going to be, and what conclusion you want to reach at the end of the post, but you get muddy along the way. It's very easy to want to go from A to B to C, only to actually read the post you wrote and see that you left out B. People reading see the jump from A to C and feel like it's not very useful since it's a logical leap without any support. You have the support, but you didn't write it down.
3. One of the reasons I most heavily use outlines is for editing purposes. I'll draft up an outline with my key points, and then I'll think about the logic, the grouping, and organization, the structure of the piece. Is it top-heavy with a larger first section and light on conclusions? Is it spending too much time belaboring the point and not enough time supporting it?
One of the places this ends up being very handy is in those "top 50 tools to do X" posts I write. Like this one, for example. I'll put together the list, but before I write descriptions for any of them, I'll reorganize the list into logical groupings. Sometimes I'll choose to divide up the post into sub-formatted sections for each grouping, and sometimes not, but it's helpful for organizing them when I do.
4. Outlines are also useful for figuring out how to spread embedded content. You can add placeholders for images, figure out an even distribution for links, and arrange your content to your liking. This is great if you're hoping to incorporate any branding materials and elements like logos, slogans, CTAs, and more.
5. Lastly (and perhaps most importantly,) outlines help make writing blog posts much easier. Writing from start to finish in one unbroken stream of consciousness is fine for a personal blog or a quick 500-word blog post, but that starts to fall apart when you get into 2,000 or 3,000-word posts. Writers who do this can end up with writer's block, and their blog posts sound more disjointed.
It's tough to know when to start a new section and when to end one when you don't have a basic structure yet.
The question is, how do you make one?
How to Write a Great Blogging Outline
Outlines in blogging are a little different than outlines when you're writing an academic paper or something of the sort. You aren't as rigidly constrained, and it's more of a tool to help you organize your thoughts than it is some assignment you're going to be graded on.
I'm going to write out a process here, but it's not quite the process I use. My process is a little less structured, in part because I've internalized some of these steps and kind of just do them mentally while I'm composing the others. Here's how I would help someone else do it, though.
0. Lay the groundwork for a solid post. The first thing you should do, which isn't really part of the outlining process, is to set yourself up for success. What do I mean by this? In particular, this is where your keyword research, topic ideation, and reader persona analysis comes into play.
You can write a blog outline about anything, but how do you know if the topic is worth writing about at all? You need to do the groundwork so you have a solid base from which to write, knowing that your content will have at least a baseline minimum amount of interest.

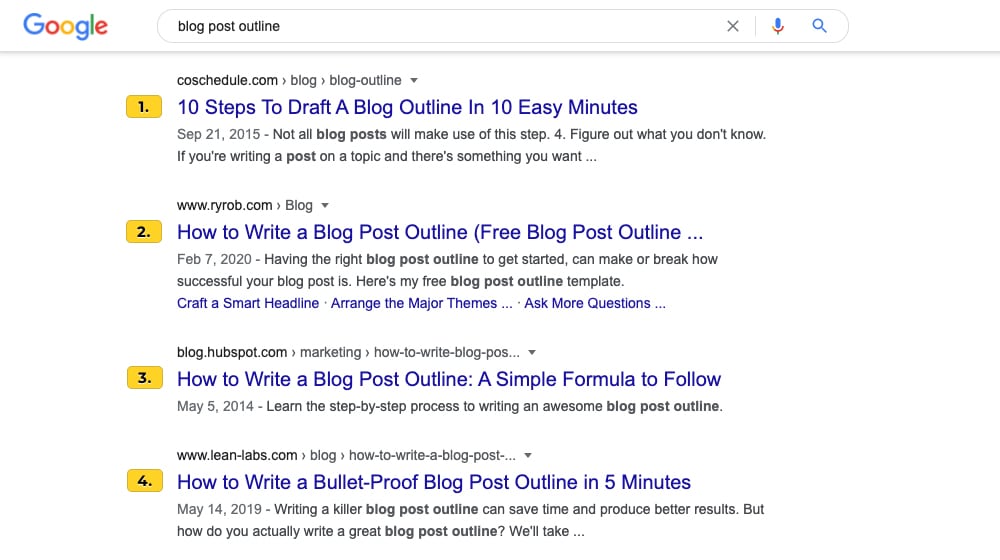
1. Research what's already out there. Some people consider this to be part of the groundwork, but I use it as the first step to composing my own outline. Virtually every possible topic you could want to write about has been written about before, by other blogs, possibly even your competitors.
Looking at these posts gives you a lot of useful information.
Understanding what's already out there also helps you figure out where to begin.
It can stimulate ideas and give you more data points, all of which can be useful in the outlining process.
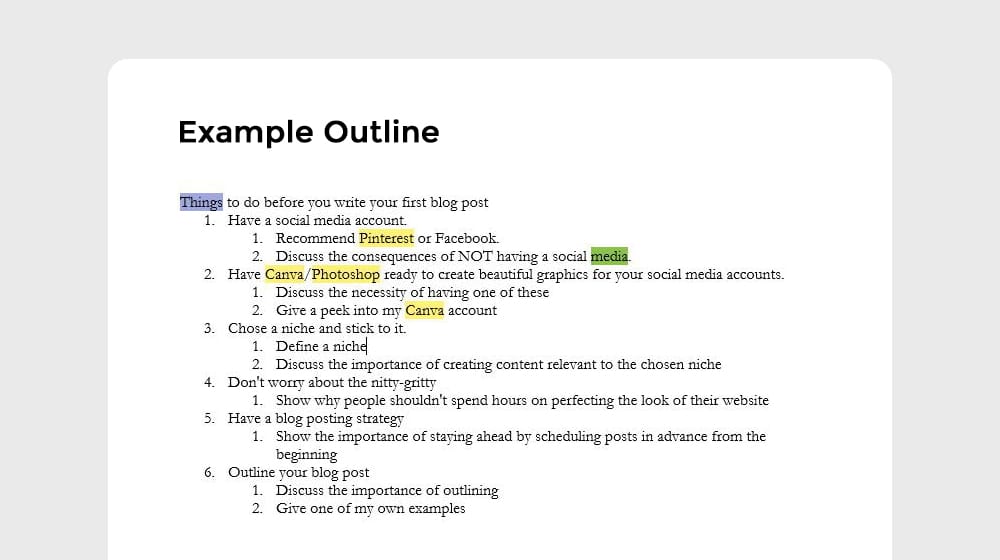
2. Figure out what your key points will be. I usually just write down the main points I want to cover in a big list as they come to me. The next step is to organize them, so don't worry about it too much right now. Just get everything on the page, so you can see it, so you can read it, so you can use it to inspire further points.
Eventually, you'll start to work this and the next couple of steps into one core process. You'll configure your brain to start coming up with these ideas in a logical fashion and you won't have to do as much reorganization. Still, though, this part of the process helps primarily to spot gaps in what you're covering, to write down important points you might otherwise forget, and to include salient links you absolutely need to include in your finished post.
3. Organize your points in a logical fashion. Once you have your big list of points and pieces of information, start to organize them. I tend to do this naturally while I'm writing them down, but there's always a few I want to move around.
During your initial brainstorming, it's not unusual for several of your points to end up sub-points for other points. You'll end up with what is basically a partial outline; some main topics, some sub-topics, room for another main topic or two, possibly even a few bits you want to cut because they aren't that relevant.
While you're going through this, think about questions you might want to ask to expand sections. More importantly, think about what questions your readers might have as they're reading through. Are there points they have answered later, or is it something you should include more information to cover? This is your best chance to add major points and nail down the overall structure of your post.
4. Break down each point into key facts, conclusions, or arguments. Every subheading should have several points it covers. I like to aim for 2-3 on average, but sometimes they expand and get away from me. Larger or more complex subheads might be an ideal opportunity to add in a bulleted list, for example. I also tend to seed in a topic or two that I don't intend to cover, but which can form the basis for a good internal link.
In a way, you can think of each section as a miniature blog post in the making. It's a smaller, narrower topic than the overall topic, but it still needs the intro, meat, and conclusion pattern that your overall post will have. Some topics will be large enough that you might want to break them up into a couple of sub-sections as well.
5. Figure out what data is needed to support your arguments and insert them where necessary. I tend to start a lot of my blog posts with a data-first approach; I have interesting data I want to write about, and I flesh out my article from there. Other people start with a topic they find interesting or a keyword that seems applicable and then figure out their data and sources afterward. Either option is fine, it just comes down to your topic ideation process.
This step is where you start to fill out salient details in your outlines. If you draw a conclusion, make sure you have steps leading up to the conclusion. If you state something as a fact, make sure you have data sources to cite to that supports that fact. In general, you want to make your post as well-supported as possible, whether it's first-hand data, anecdotes, charts / graphs, or case studies you link to.
6. Balance the sections. Determine if something isn't relevant and can be cut, or if something is critical and needs to be expanded. Sometimes, try as you might, a point you wanted to make just doesn't fit. If it's a conclusion you really want to write about, you can set it aside and write another blog post about it another time. If it's just a fringe conclusion, then just cut it, it's fine.
I often find that I go overboard with my outline and have to cut a bunch in order to keep my blog posts to a reasonable word count. If you're not concerned with word count, you can always write something longer, though your audience may bounce before finishing it all. I know many people struggle to write longer posts, too, which can be a sign that you want to include more points throughout your post to expand upon.
Consider that each "section" of a post is generally going to be between 100 and 300 words long, depending on how deep you're covering it. Each of these steps, for example, is about 100-200 words. A longer section overall might be 400 or so, but if you let them get too much longer, you might consider breaking the whole thing down more thoroughly and adding another subheading.
In some cases, if a section is too big, splitting it into smaller, more digestible chunks (I'm talking about H3s) is the best course of action.
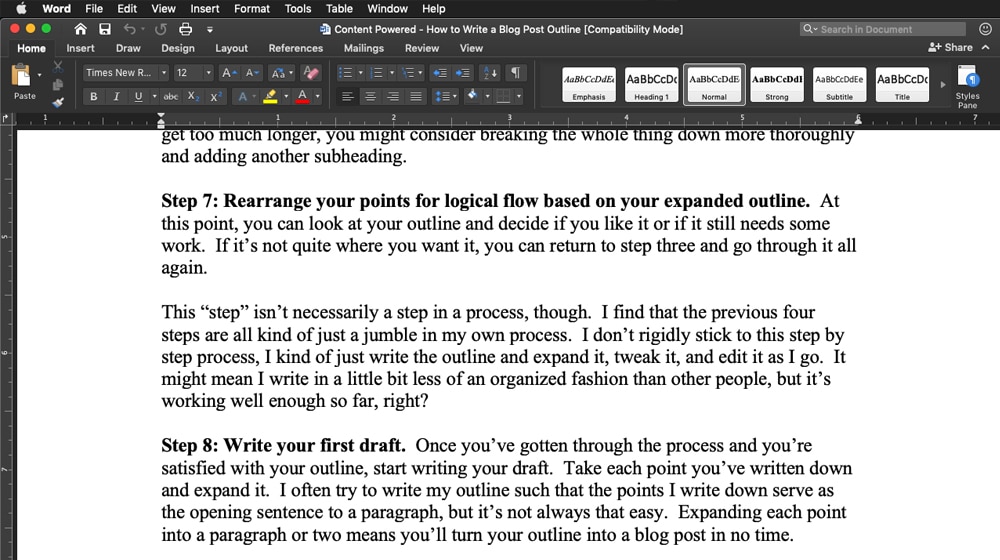
7. Rearrange your points for logical flow based on your expanded outline. At this point, you can look at your outline and decide if you like it or if it still needs some work. If it's not quite where you want it, you can return to step three and go through it all again.
This "step" isn't necessarily a step in a process, though. I find that the previous four steps are all kind of just a jumble in my own process. I don't rigidly stick to this step by step process, I kind of just write the outline and expand on it, tweaking it and editing it as I go. It might mean I write in a little bit less of an organized fashion than other people, but it's working well enough so far, right?
8. Write your first draft. Once you've gotten through the process and you're satisfied with your outline, start writing your draft. Take each point you've written down and expand on it. I often try to write my outline such that the points I write down serve as the opening sentence to a paragraph, but it's not always that easy. Expanding each point into a paragraph or two means you'll turn your outline into a blog post in no time.
As you write, you might find that your points aren't lining up the way you want them to. Sometimes you can bend your flow back in line, and sometimes you'll just need to retool your outline. Both are fine; remember, you aren't being graded on any of this.
9. Edit and improve your draft. Some people write pretty good first drafts and only need relatively minor tweaks to make them post-worthy. Other people will need two or three rounds of edits to hammer their drafts into top shape. Now is the time to do it, once you've taken your outline and expanded it into a draft. A paragraph length checker can be a handy tool during this stage to keep your formatting tight and readable.
10. Figure out your post title. Some people who provide their own processes say you should come up with your title first, and I don't disagree. I often come up with a working title as part of the step 0 phase all the way up at the top. At this point, your overall topic may have shifted and a new title would be better. After all, if you set out to write a "Top 25" list and it ended up as a "Top 50" list once you were done, you'll have to change it anyway. Right?
Free Blog Outline Templates
Now, I promised you some blog post templates up at the top, and I'm going to give you some. Here are some I've found and like.
1. HubSpot's Fill In The Blanks Template. This is a good template for a basic blog post, but it's short and it's very, well, template-like. It can get you something serviceable in the 500-1,000 word range, but you really want to take the whole thing and expand it for a good modern blog post.
"If you're looking for a _____________, the best method to ensure you end up with something that lets you _________________ is by looking for these things:
While not necessary, some great bonus features of a great _____________ are __________, ____________, and _______________."
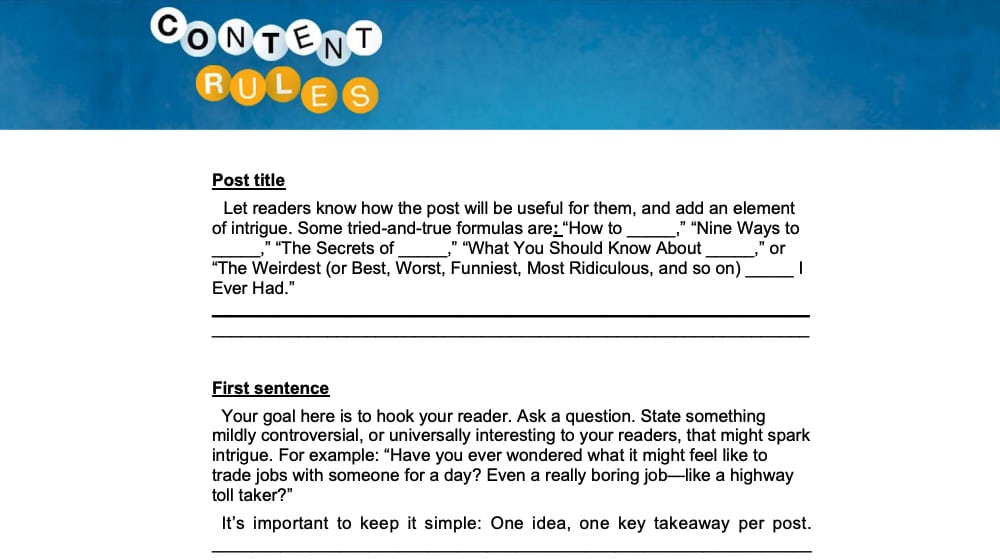
2. Content Rules' Homework Sheet. This is a PDF from Content Rules with a template that works more like a worksheet. It lines up each element of a blog post and has you fill in what you'd want in that place, with some simple guidelines.
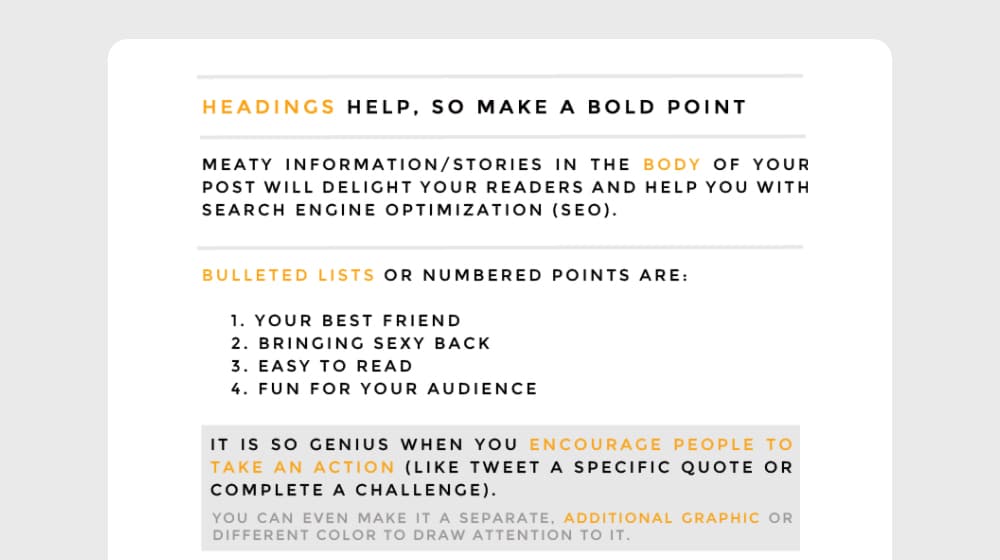
3. Writers Write's Post Template. This template is an infographic-style rundown of the elements of a blog post, in a compelling layout and order. It can help you with both layouts and with rationalizing the different parts of a post.
I'll say one thing before I let you go, though; template-based blog posts aren't usually my first choice.
Why? Well, when you're relying on a template, you're removing your voice and style from the equation. You'll have a better return if you simply hire a talented writer to do your blogging for you, at that point.
Written by James Parsons
Hi, I'm James Parsons! I founded Content Powered, a content marketing agency where I partner with businesses to help them grow through strategic content. With nearly twenty years of SEO and content marketing experience, I've had the joy of helping companies connect with their audiences in meaningful ways. I started my journey by building and growing several successful eCommerce companies solely through content marketing, and I love to share what I've learned along the way. You'll find my thoughts and insights in publications like Search Engine Watch, Search Engine Journal, Forbes, Entrepreneur, and Inc, among others. I've been fortunate to work with wonderful clients ranging from growing businesses to Fortune 500 companies like eBay and Expedia, and helping them shape their content strategies. My focus is on creating optimized content that resonates and converts. I'd love to connect – the best way to contact me is by scheduling a call or by email.


October 04, 2020
Nice article. Hopefully this makes me a better article writer 😂 my blogger friend recommended starting with an outline so here we are.
October 05, 2020
Hi Tamika! It helps us so much, we can't imagine writing an article without one. You can get all of your sources right away, key point that you want to hit home, and structure the order of your article in a way that makes sense. I definitely recommend it, give it a try and report back 🙂 happy to help.
October 28, 2020
I didn't know writers created outlines before writing until speaking with my friend who is a full-time writer. This makes a lot of sense and we used to have to create outlines like these back in college. No wonder these were so hard to write. When you break it down into chunks like this it seems way more manageable, even at the 1500+ word mark.
November 01, 2020
I can't even imagine what our posts would look like if we didn't carefully outline each of them first. They are game changers. I'm glad this helped you, give it a shot and let us know how it goes!
October 04, 2022
I'm completely lost so I really appreciate the templates you've shared! I'll take note of your caution against template-based blog posts though.
October 07, 2022
Glad I could help!
May 01, 2023
Hey James,
I am a huge fan of your content and thoughts. Because your information is Authentic, engaging and personalized.
Thanks for sharing these tips.
May 03, 2023
Thanks Mubasher! That means a lot 🙂
November 19, 2023
hi! my name is Rania Ashfaq and I'm working on improving content writing, this helps a lot. please keep writing!
November 20, 2023
Hey Rania, I'm super happy to hear that! Good luck and keep creating good content for people 🙂